Taking inspiration from this post:
https://www.explorerst.org/threads/...ted-cup-holders-glove-box-light-missing.7831/
I created my own adapter harness to power the ST lighted cup holders that were removed in the later ST model years. Here's documentation of what I've done with included part numbers so you can create your own harness.
Note for the folks who don't want to DIY, you can send these instructions to a car audio shop and they can build out the harness for you.
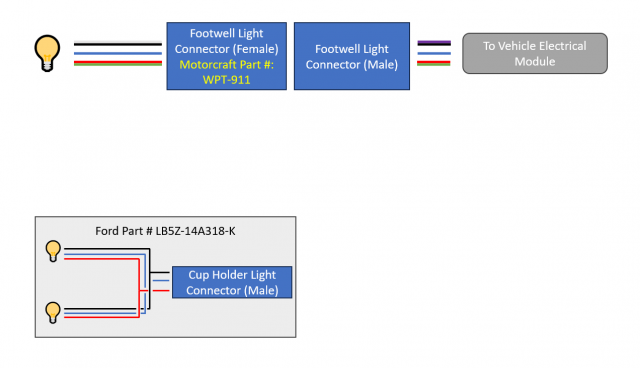
The Core Parts:
Lighted Cup Holder: LB5Z-7813562-BA
LED lights and harness: LB5Z-14A318-K
Tools and other Materials you May Need:
There are 3 wires that power the LED light:
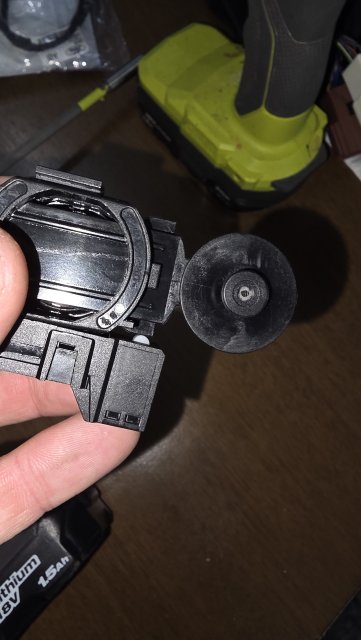
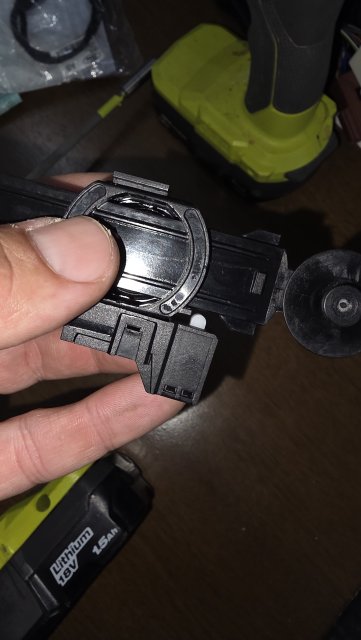
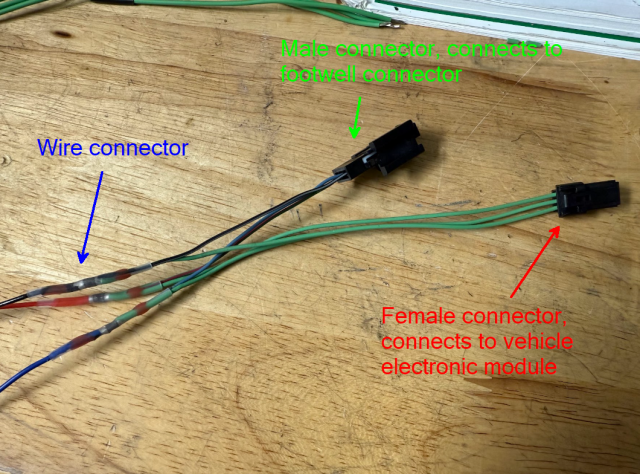
The LED lights and harness for the Cup Holder have the same wiring configuration as well (black is one side, blue is in middle, red is on other side of the connector housing). The wires are actually black/grey or black/purple, blue, and red/green, but I'm going to just refer to these wires as black, blue, and red.
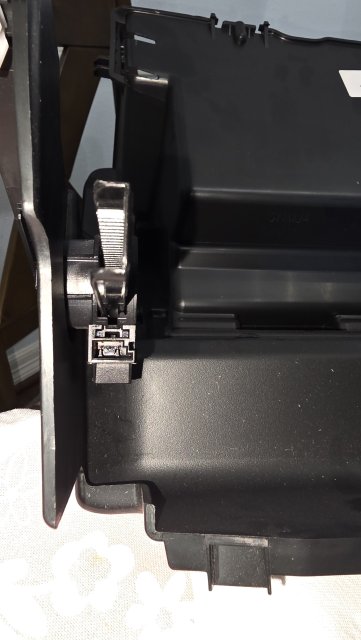
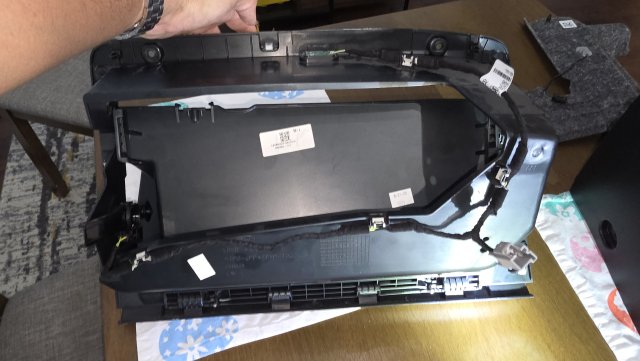
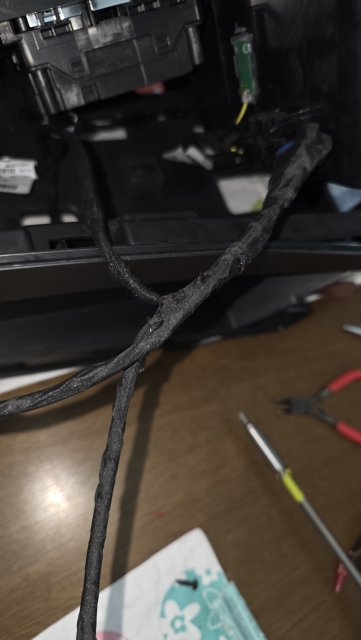
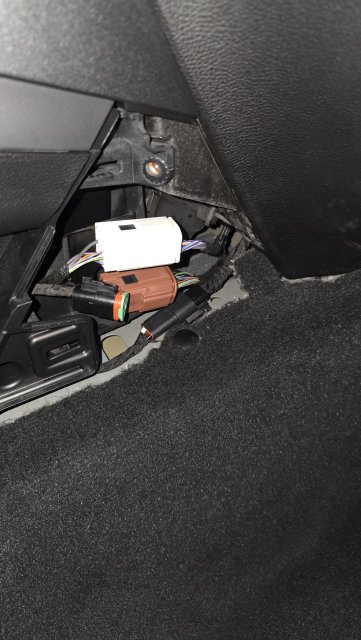
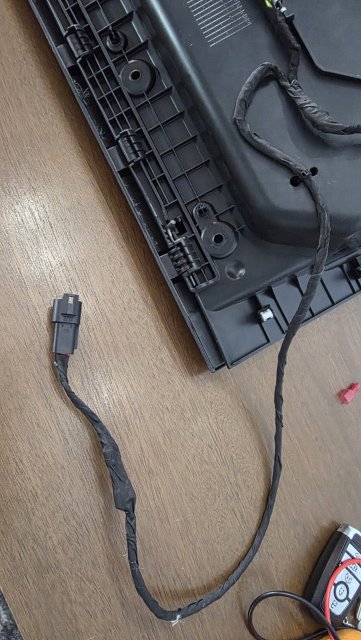
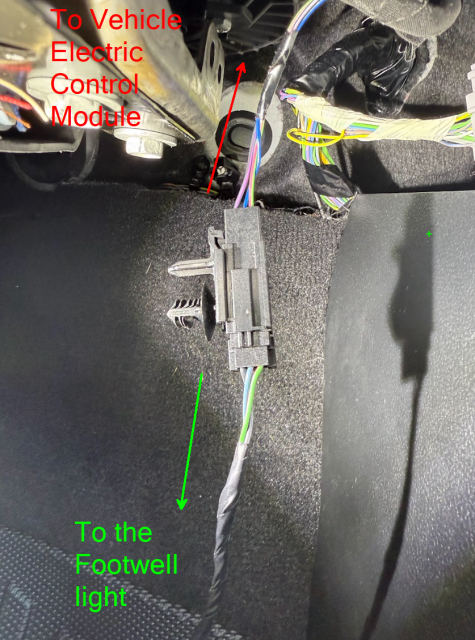
Here is what the Footwell connection actually looks like:
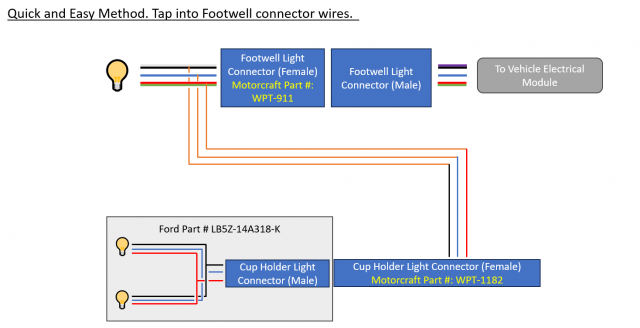
Quick and Easy Method
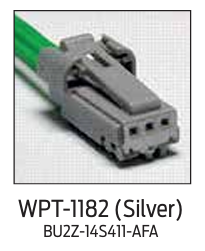
If you don't care for making the wiring "pretty", you can just buy one pigtail (Motorcraft Part #WPT-1182) and use wire taps to tap into the wiring for the Footwell light. You will need to get extra wire, wire connectors, and wire taps as well to make it all work.
Be sure to match the wire colors up when you're taping the wires:
More Professional Method
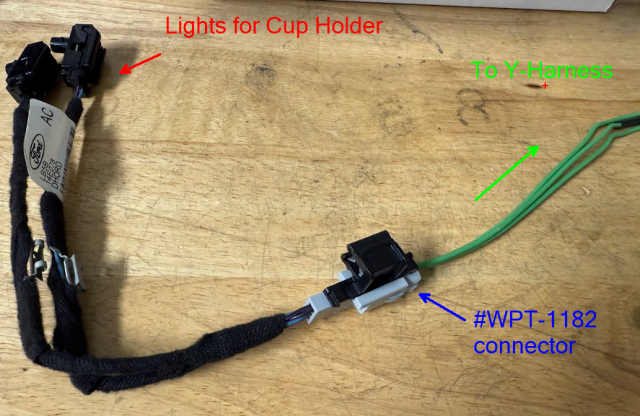
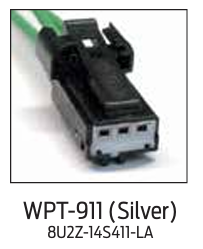
This is what I opted to do. I got two additional pigtails to create a Y-style harness that is plug-and-play (no wire taps). In addition to #WPT-1182, I needed to get:
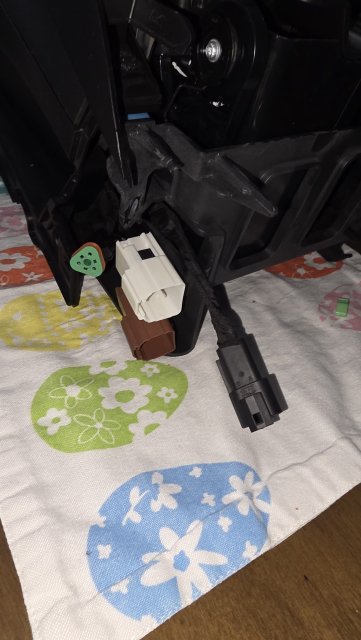
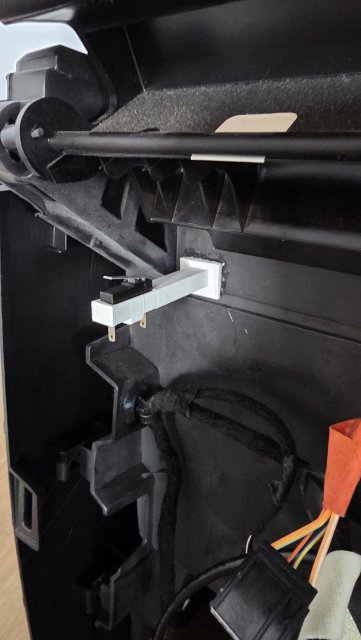
Here is the part number for this footwell light connector:
#LB5B-13E721-AC
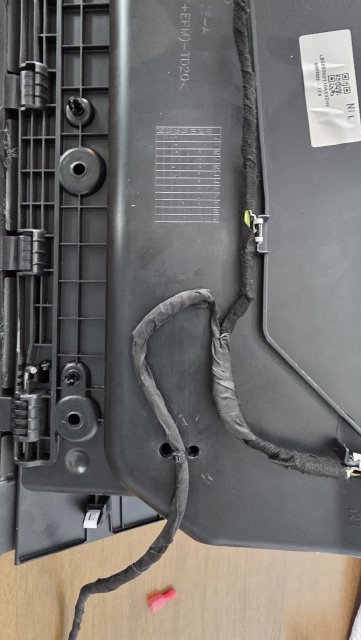
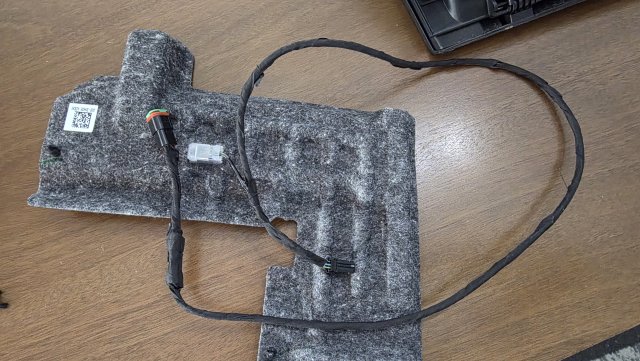
Once I have all my connectors in place, I used solder seal connectors (it's a combination of solder and heat shrink tubing) with my heat gun to create the Y-connector:
I then used another set of wire connectors to connect to #WPT-1182 which connects to the Cup Wiring harness.
Watchouts
These pigtails are not cheap! If anyone knows where to source the actual connector housings and terminals, please chime in. I believe these are USCAR style connectors, but I'm not sure since I could not find a part number on the connector housing itself unlike other connectors that you find on foreign cars such as Volkswagen.
Building the pigtails from scratch will reduce the overall material cost immensely. I manage to find good deals on these pigtails on eBay.
There are two additional ways to do this cheaply:
https://www.explorerst.org/threads/...ted-cup-holders-glove-box-light-missing.7831/
I created my own adapter harness to power the ST lighted cup holders that were removed in the later ST model years. Here's documentation of what I've done with included part numbers so you can create your own harness.
Note for the folks who don't want to DIY, you can send these instructions to a car audio shop and they can build out the harness for you.
The Core Parts:
Lighted Cup Holder: LB5Z-7813562-BA
LED lights and harness: LB5Z-14A318-K
Tools and other Materials you May Need:
- Wire stripper
- Scissors
- Electric felt tape
- Wire taps (I highly recommend PosiTaps)
- 22 or 20 gauge wire
- Heat gun
- Wire connectors. Several choices available:
- Crimp
- Posi-Lock
- Solder seal
There are 3 wires that power the LED light:
- One wire is ground
- Two wires are digital signals sent to the microcontroller for the LED light. I assume they control luminosity and color.
The LED lights and harness for the Cup Holder have the same wiring configuration as well (black is one side, blue is in middle, red is on other side of the connector housing). The wires are actually black/grey or black/purple, blue, and red/green, but I'm going to just refer to these wires as black, blue, and red.
Here is what the Footwell connection actually looks like:
Quick and Easy Method
If you don't care for making the wiring "pretty", you can just buy one pigtail (Motorcraft Part #WPT-1182) and use wire taps to tap into the wiring for the Footwell light. You will need to get extra wire, wire connectors, and wire taps as well to make it all work.
Be sure to match the wire colors up when you're taping the wires:
- Black taps into Black
- Blue taps into Blue
- Red taps into Red
More Professional Method
This is what I opted to do. I got two additional pigtails to create a Y-style harness that is plug-and-play (no wire taps). In addition to #WPT-1182, I needed to get:
- One #WPT-911
- The male equivalent for #WPT-911
Here is the part number for this footwell light connector:
#LB5B-13E721-AC
Once I have all my connectors in place, I used solder seal connectors (it's a combination of solder and heat shrink tubing) with my heat gun to create the Y-connector:
I then used another set of wire connectors to connect to #WPT-1182 which connects to the Cup Wiring harness.
Watchouts
- When using the Motorcraft pigtails, make sure each wire corresponds to the correct wire color. You will need to test fit your pigtails and note which of these green wires corresponds to which colored wire on the other side of the corresponding connection.
- When testing your wiring, the car may cut power to the footwell light wire when it doesn't detect the footwell light over a period of some determined time. This happened on my car and I had to close the door, lock the car, and then open the car to get power from the footwell connection.
These pigtails are not cheap! If anyone knows where to source the actual connector housings and terminals, please chime in. I believe these are USCAR style connectors, but I'm not sure since I could not find a part number on the connector housing itself unlike other connectors that you find on foreign cars such as Volkswagen.
Building the pigtails from scratch will reduce the overall material cost immensely. I manage to find good deals on these pigtails on eBay.
There are two additional ways to do this cheaply:
- Tap into each wire that goes into the LED Cup holder lights and connect those wires to the Footwell wires. You will need 6 taps for the cup holder side and at least 3 taps for the footwell side.
- Forgo the female housing connector and just push in the female terminal pins directly into the male pins, aka "flying leads". The terminal pin width is approximately .70 mm to 1.1 mm. You will need to experiment and order a few different sets of female terminal pins from Mouser Electronics or DigiKey to find which one works.
Last edited:
-
 9
9
- Show All
")