• Sign Up! To view all forums and unlock additional cool features

    Welcome to the #1 Explorer ST Forum and Explorer ST community dedicated to Explorer ST owners and enthusiasts. Register for an account, it's free and it's easy, so don't hesitate to join the Explorer ST Forum today!


UniJack review.

ZRX61

Member
U.S. Air Force Veteran
Messages
314
Reactions
193
Points
37
Location
L A, CA, USA
#1
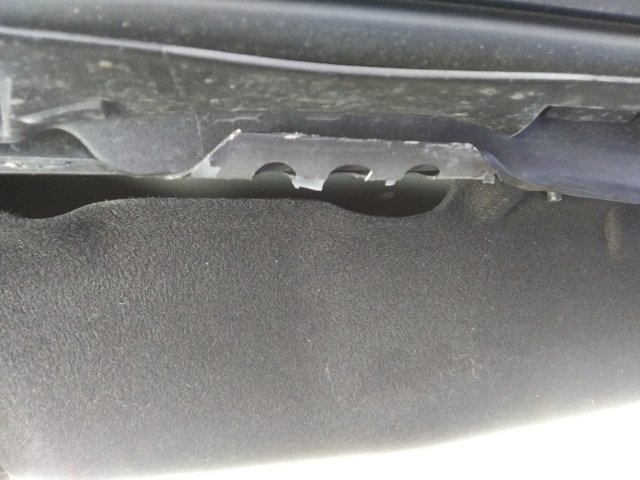
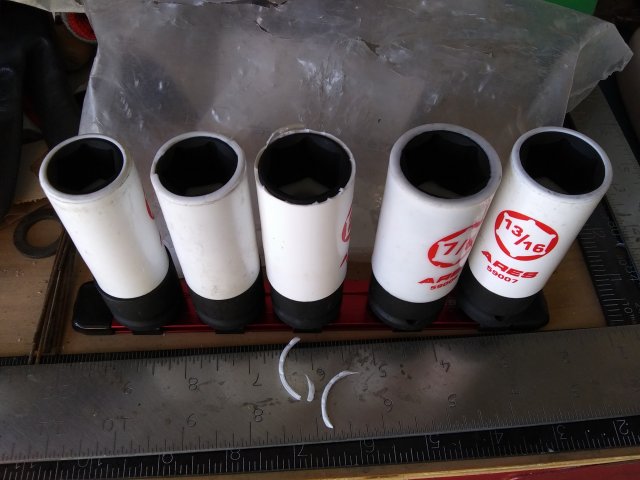
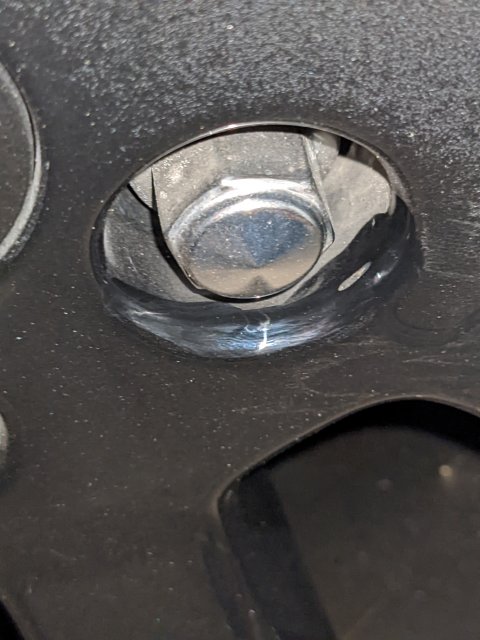
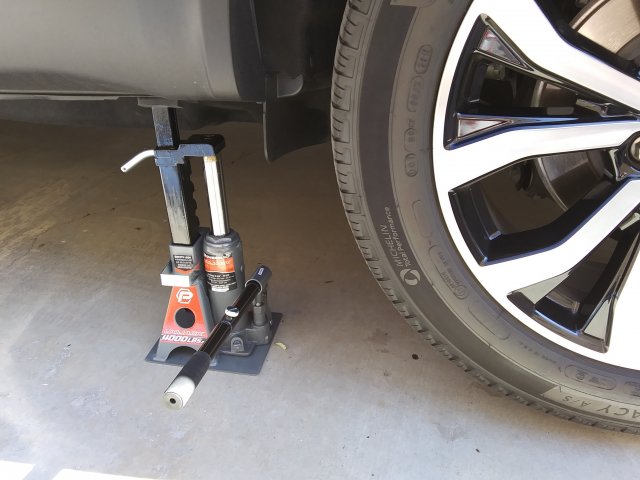
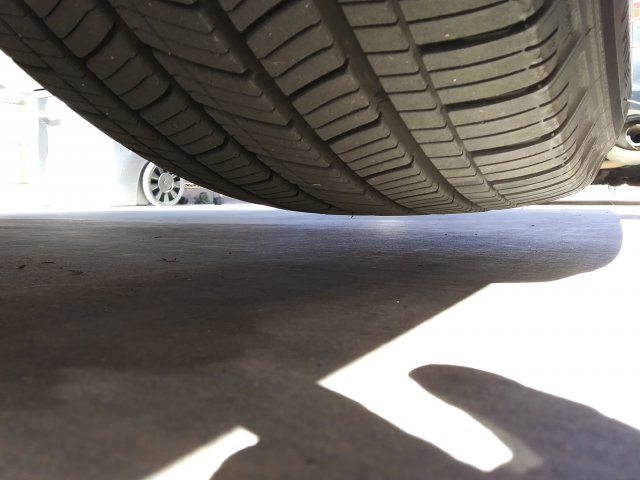
Bought the 4000lb version. Put it under the left front jack point. Couldn't extend it enough to get the pin in the 4th hole so had to lift with it in the 3rd. It didn't lift far enough to get the wheel off the ground. Well crap, that sucks.
I also had the pin in the wrong location.

20220201_112440.jpg 20220201_112556.jpg

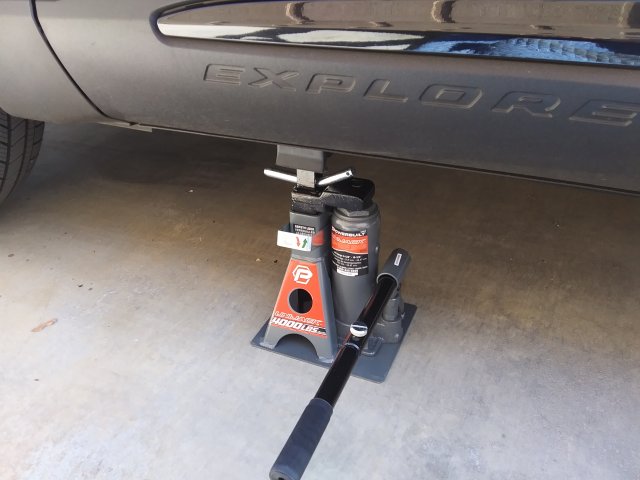
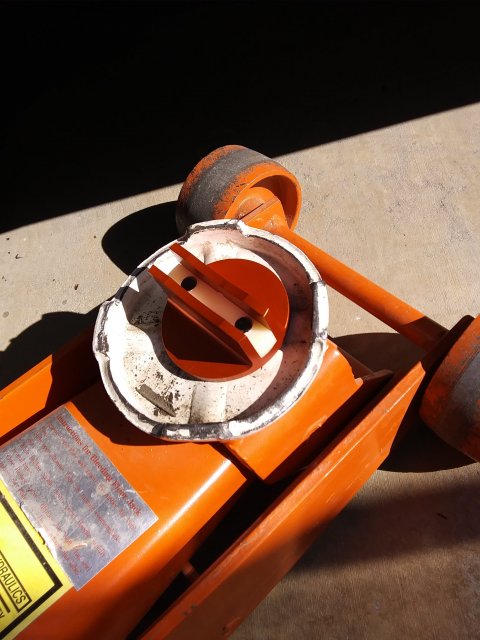
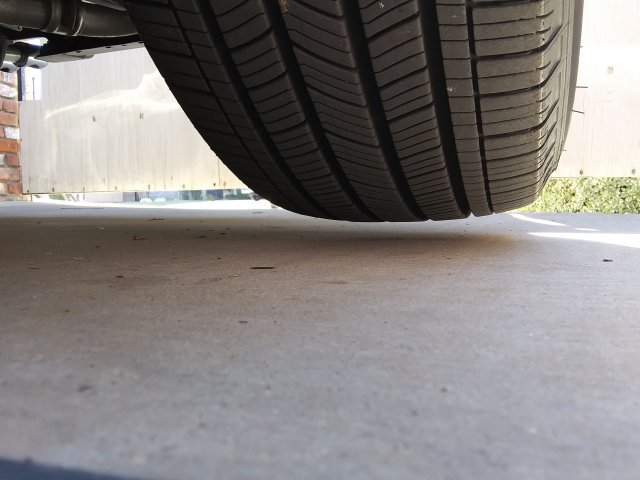
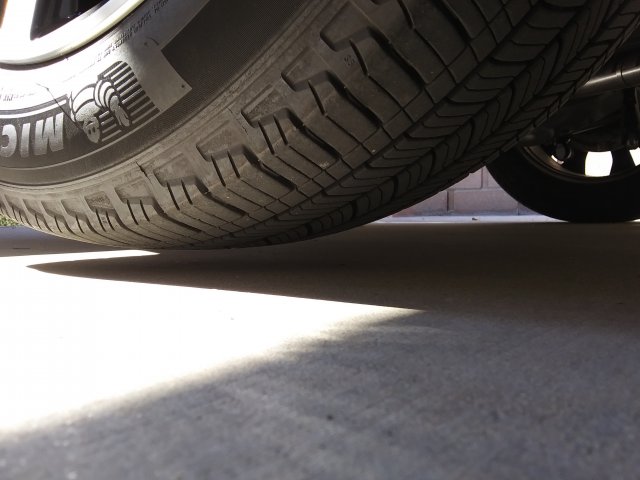
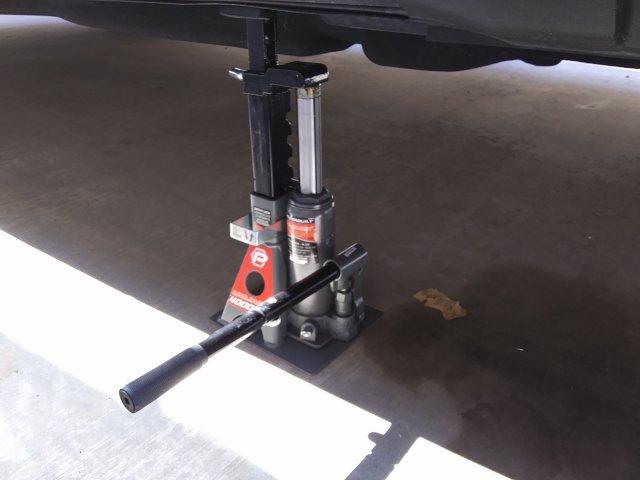
Decide to try it under the left rear. Got the pin in the 4th hole & then slid the rubber pad onto it. A slight ballache, but it lifted the left rear about 1/2in clear of the ground (& had the pin in the correct location)

20220201_113222.jpg 20220201_113243.jpg 20220201_113307.jpg

ok, 50% success so far.
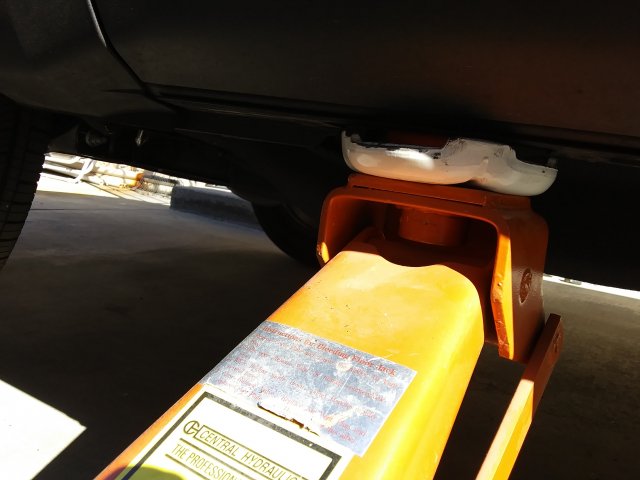
Left rear:

20220201_113816.jpg 20220201_113825(1).jpg

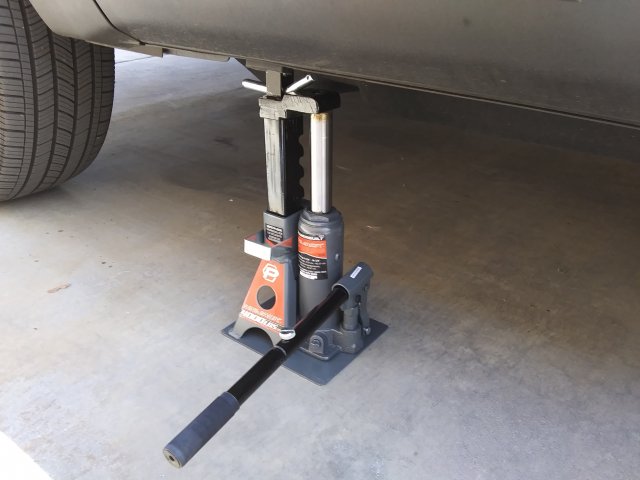
WooT!! 2 outta three!!
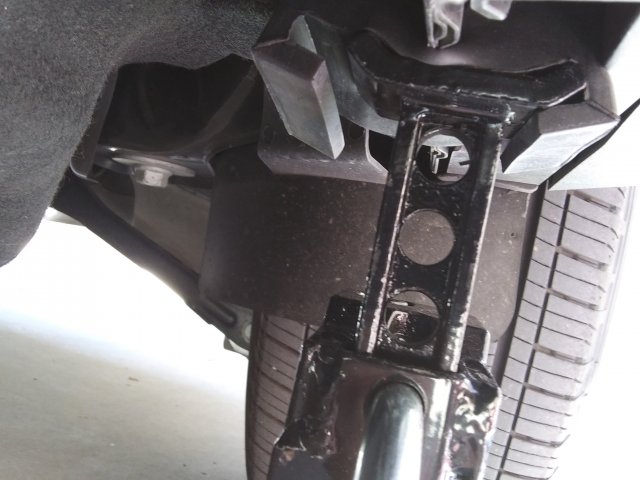
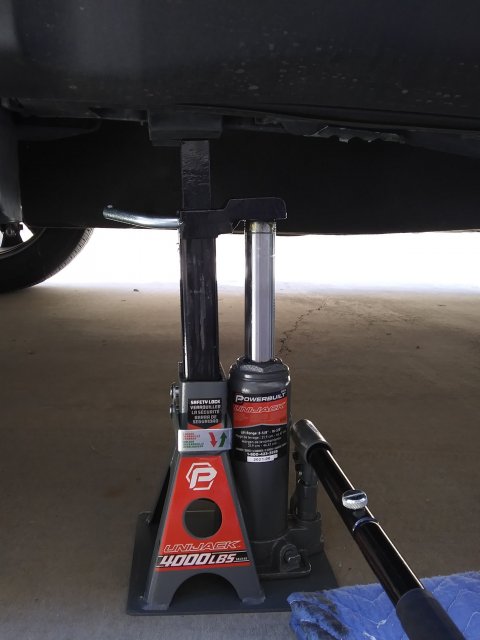
Front right:

20220201_114955.jpg 20220201_115008.jpg

YAY!! 75%!!!
 

OP
ZRX61

ZRX61

Member
U.S. Air Force Veteran
Messages
314
Reactions
193
Points
37
Location
L A, CA, USA
Thread Starter #2
Then I tried the front left again with the pin in the correct location. No joy. However, the driveway leans to the left so there was more weight on that corner of the ST.You can see the slope in the 4th pic looking at the bottom of the gate behind the ST.
Overall I'm happy & will buy a 2nd one.

I *think* the 6000lb version will fit under the ST & it lifts higher, but with that said, it looks like it will be tight & the pad would be at it lowest position without the pin. I'm going to contact the company & get the exact height of the 6000lb version. The 4000lb version is a hair under 10in.

I'll probably also cut a couple of pieces of 2x8 (or 10) to act as a pair of 1.5in tall ramps for the front wheels. I just need enough lift to get the pin in a lower hole. Tried a piece of 1/2in ply under the front left tire, wasn't enough.

Anyone around the Cypress Ca area?
 

Last edited:
OP
ZRX61

ZRX61

Member
U.S. Air Force Veteran
Messages
314
Reactions
193
Points
37
Location
L A, CA, USA
Thread Starter #3
& found this while under there, both sides bent... as expected

20220201_113943.jpg
 

OP
ZRX61

ZRX61

Member
U.S. Air Force Veteran
Messages
314
Reactions
193
Points
37
Location
L A, CA, USA
Thread Starter #4
also tried out the other pinchweld doodad with my ancient 3 ton floor jack from Horrible Fright. Works great so long you align the cup so the ears don't hit the bottom of the ST... of course then ya need to put a jackstand somewhere else.

20220201_131529.jpg 20220201_132251.jpg
 

OP
ZRX61

ZRX61

Member
U.S. Air Force Veteran
Messages
314
Reactions
193
Points
37
Location
L A, CA, USA
Thread Starter #6
I'd seen that, but the website also states the 4000lb version lifts from 8-5/8 to 18-3/8in... but it's a little under 9 1/4 with the rubber pinch weld pad.

& then there's the actual stroke of the jack, they're stating 11 to 21 based on 11 being without the pin in any holes & 21 with the pin in the lowest hole.
 

Last edited:

Cdubya

1000 Post Club
Messages
1,476
Reactions
722
Points
262
Location
NE Ohio
Vehicle
2020 Explorer ST
#7
What's the Cliff Notes version of this novella?
 

OP
ZRX61

ZRX61

Member
U.S. Air Force Veteran
Messages
314
Reactions
193
Points
37
Location
L A, CA, USA
Thread Starter #8
LOL! It should work on all four corners on flat ground.
 

Cdubya

1000 Post Club
Messages
1,476
Reactions
722
Points
262
Location
NE Ohio
Vehicle
2020 Explorer ST
#9
LOL! It should work on all four corners on flat ground.
Thank you for the review. Cool product. I might get a pair for the fronts.
 

OP
ZRX61

ZRX61

Member
U.S. Air Force Veteran
Messages
314
Reactions
193
Points
37
Location
L A, CA, USA
Thread Starter #10
In related news, I decided to buy those impact sockets with the sleeve to protect the finish on wheels.

This is the first set that arrived from Amazon:

20220202_130527.jpg

This is the replacement set that arrived from Amazon 24 hours later:

20220203_144543.jpg

Both bags showed the kind of damage you'd get by running them over on a gravel road. The first bag even had a tire mark on the address label.

Today I hit Horrible Fright & picked up this set, They had cheaper ones, but these are full lifetime warranty:

20220204_120313.jpg
 

Messages
455
Reactions
229
Points
37
Location
Davidson County, NC
Vehicle
2021 ST
#12
Wish my dealer used those. :mad:

766ACD70-81DD-4A29-8101-436CB66EFC5E.jpeg F0A1424C-2D21-455B-BAEE-BACD01502D06.jpeg C951EE5D-8590-45C2-8154-70AD15E7C2B6.jpeg
 

OP
ZRX61

ZRX61

Member
U.S. Air Force Veteran
Messages
314
Reactions
193
Points
37
Location
L A, CA, USA
Thread Starter #13
Did the metal bend with their pinch weld adapter? I think I see the adapter in your pics but I’m not sure.

https://www.powerbuilt.com/collecti.../all-in-one-unijack-pinch-weld-saddle-adapter
Nope, the rubber is remarkably soft considering the pinch weld is trying to cut it in half. It requires a bit of fiddling to use as the adapter is right up against the outer trim piece. I put the adapter in place first then slid the jack into it.

You can see it deforming inboard in this pic:

20220201_113307.jpg
 

OP
ZRX61

ZRX61

Member
U.S. Air Force Veteran
Messages
314
Reactions
193
Points
37
Location
L A, CA, USA
Thread Starter #14
Wish my dealer used those. :mad:
I'm not sure if HF sells the individual sockets. There were nine in the set I bought, they have a cheaper 5 piece set. Three of the nine fit the vehicles here (Camaro, Accord & the ST). I guess I need to buy 6 more vehicles.
 

GearHead_1

1000 Post Club
Messages
1,432
Reactions
1,149
Points
262
Location
Utah
Vehicle
Exploder
#15
I always break the lugnut loose with a long 1/2" breaker bar/ratchet and regular socket. I then run the lug nuts off and then back on with a 1/2" electric impact with these sockets and torque them with a torque wrench.

https://www.amazon.com/Cartman-Non-Marring-Protective-Protectors-Color-Coded/dp/B01N1J043Q/ref=sr_1_12?crid=6U5FCBEQN6M6&keywords=lug+nut+sockets&qid=1644020685&sprefix=lug+nut+sockets,aps,239&sr=8-12

There are a ton of brands that basically sell a set like this for less than $50. This is a simple set that offers better than good protection and gets the job done as I described it.
 

Messages
399
Reactions
233
Points
37
Location
Ontario, Canada
#16
Then I tried the front left again with the pin in the correct location. No joy. However, the driveway leans to the left so there was more weight on that corner of the ST.You can see the slope in the 4th pic looking at the bottom of the gate behind the ST.
Overall I'm happy & will buy a 2nd one.

I *think* the 6000lb version will fit under the ST & it lifts higher, but with that said, it looks like it will be tight & the pad would be at it lowest position without the pin. I'm going to contact the company & get the exact height of the 6000lb version. The 4000lb version is a hair under 10in.

I'll probably also cut a couple of pieces of 2x8 (or 10) to act as a pair of 1.5in tall ramps for the front wheels. I just need enough lift to get the pin in a lower hole. Tried a piece of 1/2in ply under the front left tire, wasn't enough.

Anyone around the Cypress Ca area?
You could also just put a wooden spacer under the jack so you can full use the third pin hole instead of just missing the fourth hole.
 

OP
ZRX61

ZRX61

Member
U.S. Air Force Veteran
Messages
314
Reactions
193
Points
37
Location
L A, CA, USA
Thread Starter #17
I always break the lugnut loose with a long 1/2" breaker bar/ratchet and regular socket. I then run the lug nuts off and then back on with a 1/2" electric impact with these sockets and torque them with a torque wrench.

https://www.amazon.com/Cartman-Non-Marring-Protective-Protectors-Color-Coded/dp/B01N1J043Q/ref=sr_1_12?crid=6U5FCBEQN6M6&keywords=lug+nut+sockets&qid=1644020685&sprefix=lug+nut+sockets,aps,239&sr=8-12

There are a ton of brands that basically sell a set like this for less than $50. This is a simple set that offers better than good protection and gets the job done as I described it.
My calibrated elbow is telling me there's no way in hell these were torqued to 150 ft/lb. This may have been the first time the wheel came off since it was built. I loosened them with a breaker bar & would have run them off/on with my IR Titanium, but couldn't get the enthusiasm to walk 30ft to get it & rig up an air hose. :)

As for the sockets, it appears the white nylon is stiffer than a honeymoon dick & would shatter if dropped. These HF ones have a softer plastic & have great reviews. I looked at the cheaper ones with the white nylon & don't get warm fuzzies.. especially given what happend to the first two sets.
 

OP
ZRX61

ZRX61

Member
U.S. Air Force Veteran
Messages
314
Reactions
193
Points
37
Location
L A, CA, USA
Thread Starter #19
You could also just put a wooden spacer under the jack so you can full use the third pin hole instead of just missing the fourth hole.
I figured I can use the jack under the rear lift doodad which will also lift the front enough to get the pin in the 5th hole or maybe lower (as soon as I buy the 2nd one). However, having had a wheel off this afternoon I'm not sure I want to lift one any higher than is absolutely necessary. These wheel/tires ain't light.
I meant to measure the distance under the front p/w while I had the rear up in the air, but forgot.
Plan is to clean the other three wheels on Saturday so I'll measure the space up front when I have the left rear off.
 

Messages
455
Reactions
229
Points
37
Location
Davidson County, NC
Vehicle
2021 ST
#20
I'd be pissing a fit if they did that to mine! Seriously.
Didn’t notice it until I washed it a week or two after picking it up. I suppose the dealer did it because I can’t imagine the factory letting that happen.


Top