I was having this issue on our 21 ST and finally got fed up enough with it to fix it last month. It would never show low fluid on the dash, but the pump would just run and sound like it wasn't pulling anything (spinning at a higher rpm than normal). Sometimes, if I filled it completely up and drove it around, it would start spraying, but it still took at least a couple timeouts of the WWF pump to get fluid to the windshield.
To deal with this drain-back issue you'll need two 1/4" one way valves, as well as some gasket maker if you want to seal the filler neck better than the factory did. I've used the Evil Energy valves before on a few "build your own" purge valve assemblies for our other EB-powered vehicles, so I figured if they can deal with 30 psi of boost on my car, the washer fluid line should be easy. You'll need some small hose clamps for the valves, too. I used stainless, single ear hose clamps, but about anything should be fine as long as it snugs down the rubber line to the valve.
Let's get started.
I pulled the passenger side front wheel and found it indeed was leaking from the tank.

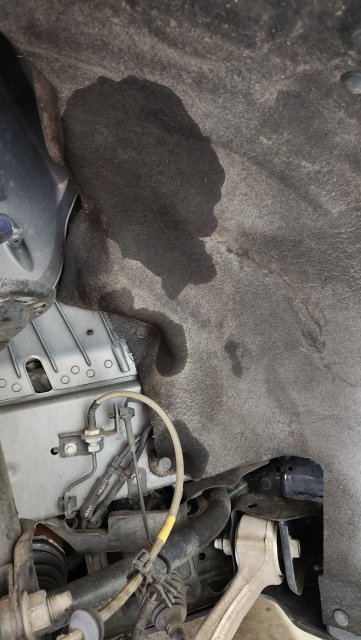
Turned out to be from where the filler neck goes into the tank. They use a rubber "seal" (let's use that term very loosely) between the main tank and the neck, and it was leaking where the seal sits in the tank opening. It wasn't leaking on the side of the seal where the filler neck is, but was leaking on the side of the seal where it sits in the hole in the tank. We'll fix that later.
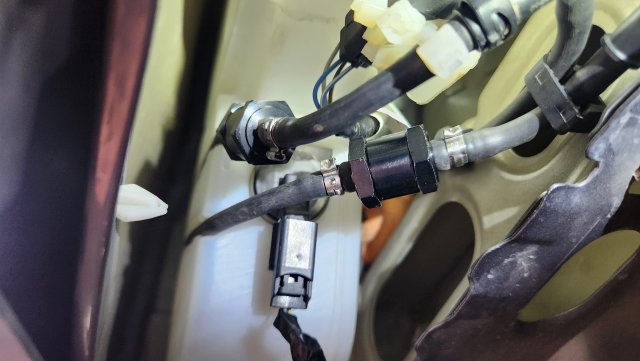
You'll need a tool to pry apart the locking push pins as well as pull the few bolts in the wheel well to get the whole wheel-well liner out. Once it's out, look up.
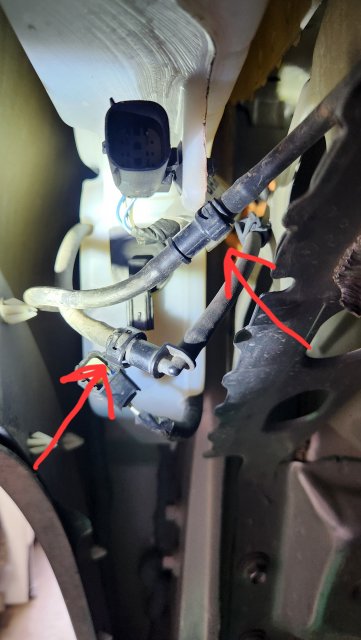
I'd already disconnected the electrical connections in this pic, but those dust-covered rubber lines need to be disconnected so you can get the tank out. Just squeeze the plastic connector (see the arrows above) to allow them to be pulled apart at that joint. Once you pull the lines apart, be ready for them to start draining whatever fluid is in the tank, so have a catch can. If you just pull one line apart and tuck it into the edge of the wheel well, you can just leave the catch can below the bottom rear edge of the wheel well and let the thing drain. It'll take a minute or two.
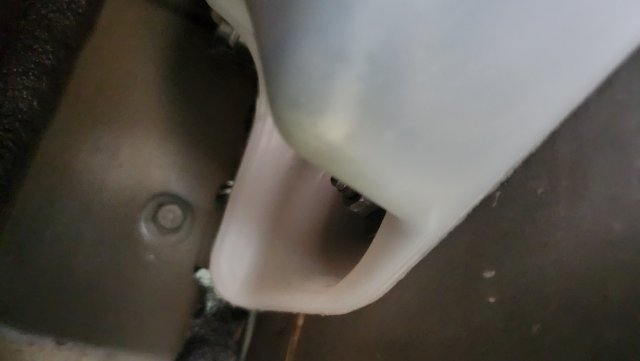
Go ahead and take loose any locking push pins/Christmas tree push pins/whatever you have holding in the filler neck up top and pull it out of the tank. Clean the filler neck of any crud and set it to the side.
Once the tank is drained, you'll have two 10-mm fasteners to remove. The one in the top of the wheel well is a 10mm bolt... That one is easy. (See the fluid trail on the tank that's been coming from the filler neck?)
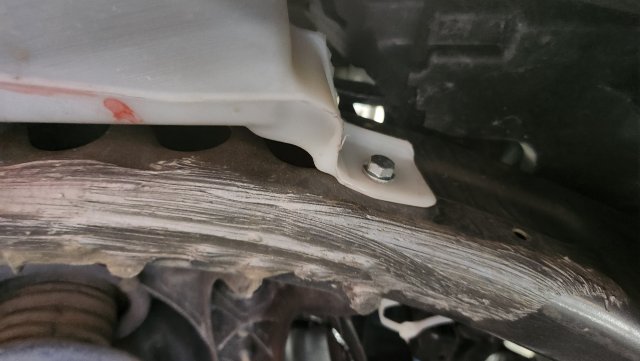
The one at the other end is more of a pain. You'll need a deep well 10mm socket to get it broken loose. Just use your fingers to finish it off once it's very loose.
Pull the tank. Now we got our ST used last summer (24), and I don't know the previous owner. Based on the damage done to the motor, FADA, and flex plate by him, though, it's safe to say the guy was an abusive moron with more money than brains. After pulling the wwf tank, though, I'm going to assume the guy was full-blown retarded. There were small, black rocks in the tank... Many (6-8) were in the 1/16" size, but one was around 3/8" in diameter. How did it get rocks in the tank? We sure didn't put them there, and that little surprise definitely wasn't on the "WWF pump issues" bingo card.
Regardless of what you find in yours, rinse it out several times and then back flush both lines going into the pump using a large syringe or something else to force water back through the pump. Rinse the tank again to remove any foreign objects the back flush brought out.
Dry off the tank filler neck opening (after removing the rubber seal) really well, and put some gasket maker along the inside edge of the tank opening hole. Once you're ready to get some gasket maker all over your fingers, put the seal back in the hole. That'll help with the leaking neck. You don't necessarily want to apply it to both sides as you may need to get the filler neck out again at some point.
Put the tank back in and be sure to line up the indexing "bump" at the top of the tank into the rubber isolator (look up into the area with a flash light). Bolt it into place, and then cut one rubber line. Don't cut them both at the same time or you might screw up which one goes where. Install the one way valve with the arrow pointing away from the tank (arrow towards the end of the line with the nozzle). Once secured, cut the other line, but do so in such a way the valves won't be side by side. Otherwise, they might be clacking against each other every time you hit a bump.
Btw, there was a plastic clamp that held the two rubber lines together (top right of this photo). I ended up not using that clip since it was crimping the lines and hindering flow with how I installed the valves. I'm sure it would have been fine if I'd cut a section of line out equal to the length of the one-way valves, so you do what you want with that. I didn't, so I just zip tied the lines to other things in the area to keep them from smacking around.
Reconnect the electrical items and push the filler neck back into the tank. Before filling the tank, hop in the car and just put it in accessory mode. You should see the low WWF warning light. If not, check the connector on the side of the tank (see the middle of the last picture above). If it all checks out fine, put at least a quart of WWF in the tank and hop back in the driver's seat. Put it back in accessory mode and try to squirt the windows. It will likely take several seconds (and maybe even a few pulls of the stalk as it times out after 10 or so seconds) to get the fluid through the 10-12' of line to the nozzles. Once you get it at one window, send it to the other one as well to verify it pushes fluid past the second one-way valve.
I did this work a little over a month ago, and we haven't had a single instance where we've hit the sprayer and not had an instant shot of WWF on either window. So, I'm pretty sure this won't be an issue any longer.

