I really didn't feel like regularly measuring the ethanol content at the pump. I know the e50 tune from ZFG can handle e40 to e60, which is easy to calculate for a single tank. My biggest concern was spiraling to one end of the spectrum due to inconsistent ethanol contents at various pumps after refilling over and over. Installing an ethanol sensor is the best way to accurately monitor the actual ethanol in the tank. If it starts to drift lower than e50 then I'll just add a bit more e85 next fill.
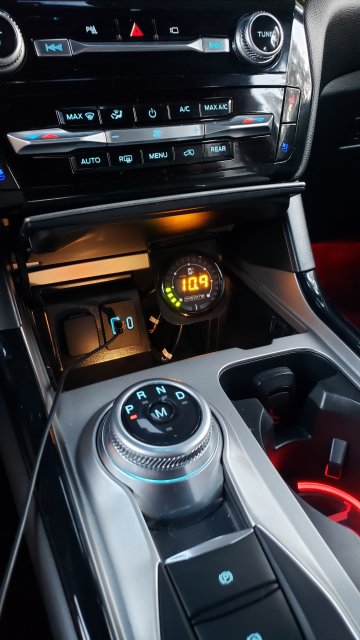
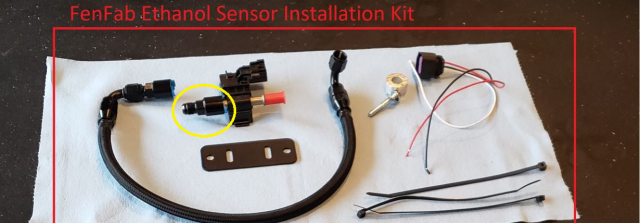
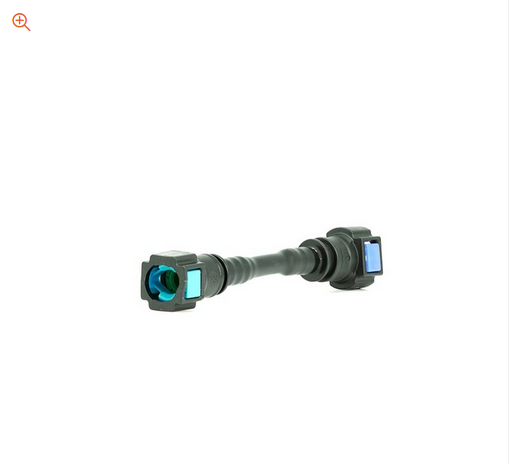
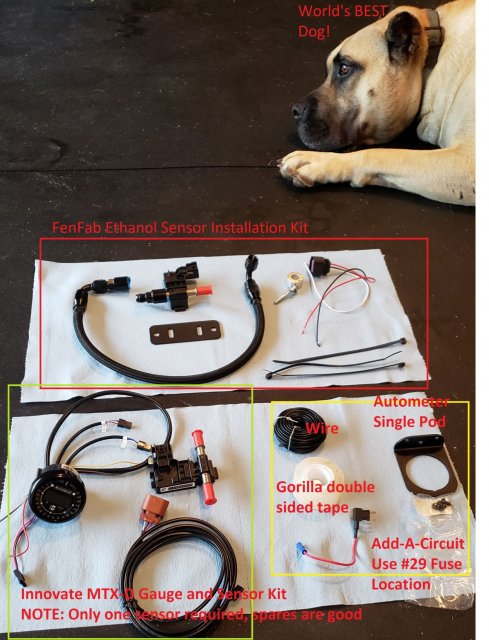
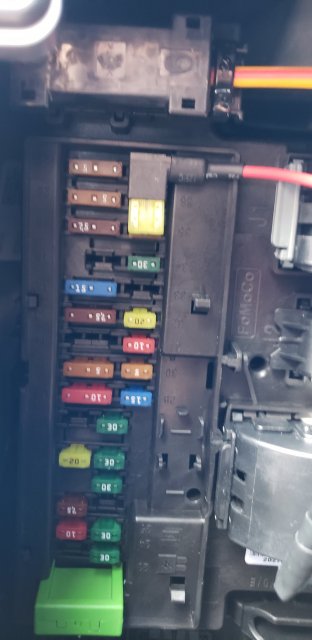
I went with the Innovate MTX-D ethanol gauge with sensor kit. Another option here is the Fuel-It bluetooth sensor kit. I was shopping around for the fittings when I saw Brett at FenFab had created his own ethanol sensor installation kit. His kit came with the hose and fittings already assembled, ethanol sensor, harness, mounting bracket, spacer/bolt, and a few zip ties. I also bought an Autometer 2236 single gauge pod to mount the gauge inside the forward center console. Fuse terminal #37 (upper RH fuse) is a switched fuse spot that I tapped in for the 12v source. Time for the dogs and I to install! (NOTE: Edit post to correct fuse terminal number).
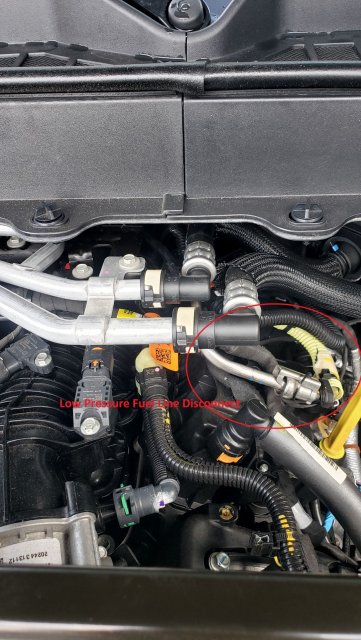
First, disconnect the negative terminal on the battery. Also, remove the strut tower brace for better clearance. Locate the low pressure disconnect on the upper driver-side of the engine bay. The goal is to disconnect this junction and install the sensor in between to measure the ethanol (or lack of gasoline) in the fuel flow.
You will need to lift the fuel line out of the bracket shown
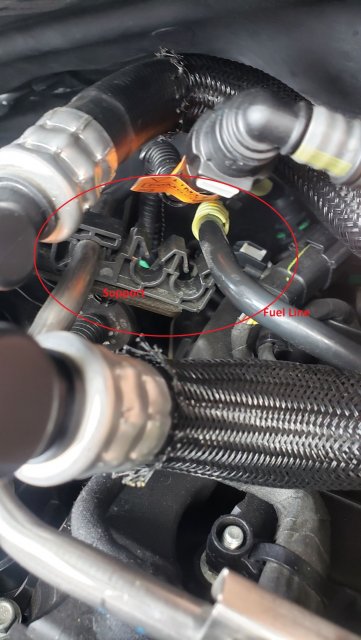
Place some old rags/towels under the disconnect spot to catch any fuel that spills out of the line. Use a Ford fuel removal tool to disconnect the lines. I believe this was a 5/16. A little pulling, pushing, twisting, and cussing will do the trick.

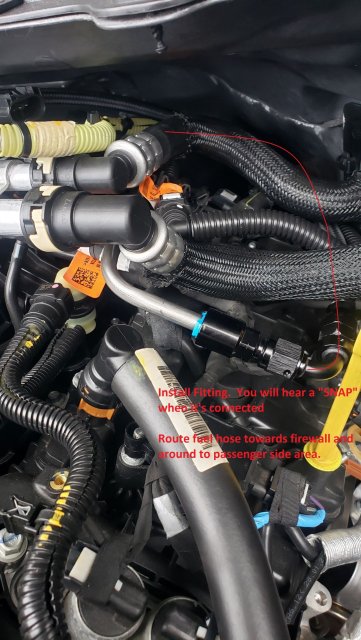
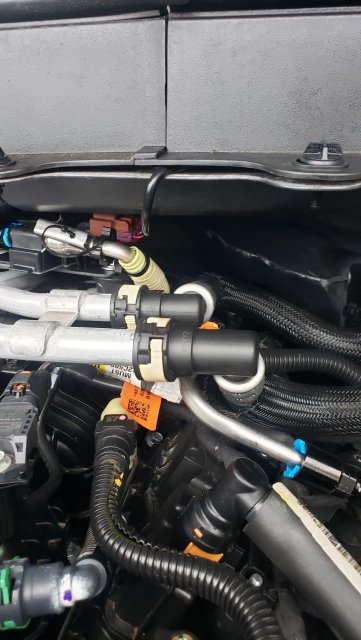
Route the new sensor line back near the firewall, connect to the male side of the OEM fuel line. Make sure your fittings are tight!
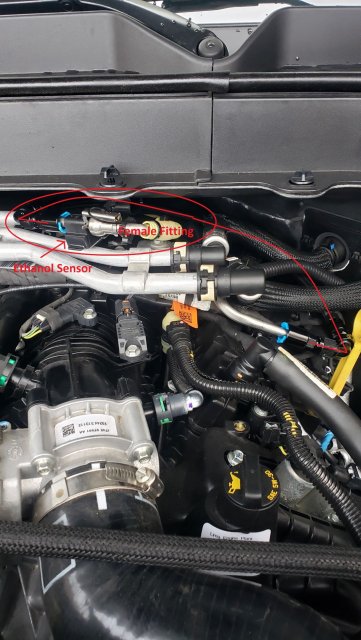
The ethanol sensor will be positioned at the upper back part of the engine, near the firewall. You will need to re-route the OEM female fuel line up here to connect to the new ethanol sensor. NOTE: The sensors from Innovate and from FenFab have pretty short tubes. Once the fittings were connected I was unable to get the disconnect tool back in there. I believe Continental has a sensor with longer tubes. The OEM retaining clip does not reinstall either. I noted the routing of the new fuel line with a red line below.
There are a few 10mm bolts you can use to install the mounting bracket. I used this one. Be careful to not drop anything in the engine bay! To get a little more clearance (height on bracket) I reused the OEM washer in conjunction with the FenFab spacer that is provided.

Tighten down bracket and attach harness. I am going to route this through a pass through one day, but for now it's just routed under the cover. I was getting hangry. Reconnect battery terminal, start car, check for leaks. For the gauge, I passed the wiring through the hood release grommet. It was a bit of a bitch, but got it done. The 12v power to the gauge also powers the ethanol sensor, so no need for power to this actual sensor.
Add-A-Circuit on Fuse #37, upper RH most fuse
I went with the Innovate MTX-D ethanol gauge with sensor kit. Another option here is the Fuel-It bluetooth sensor kit. I was shopping around for the fittings when I saw Brett at FenFab had created his own ethanol sensor installation kit. His kit came with the hose and fittings already assembled, ethanol sensor, harness, mounting bracket, spacer/bolt, and a few zip ties. I also bought an Autometer 2236 single gauge pod to mount the gauge inside the forward center console. Fuse terminal #37 (upper RH fuse) is a switched fuse spot that I tapped in for the 12v source. Time for the dogs and I to install! (NOTE: Edit post to correct fuse terminal number).
First, disconnect the negative terminal on the battery. Also, remove the strut tower brace for better clearance. Locate the low pressure disconnect on the upper driver-side of the engine bay. The goal is to disconnect this junction and install the sensor in between to measure the ethanol (or lack of gasoline) in the fuel flow.
You will need to lift the fuel line out of the bracket shown
Place some old rags/towels under the disconnect spot to catch any fuel that spills out of the line. Use a Ford fuel removal tool to disconnect the lines. I believe this was a 5/16. A little pulling, pushing, twisting, and cussing will do the trick.
Route the new sensor line back near the firewall, connect to the male side of the OEM fuel line. Make sure your fittings are tight!
The ethanol sensor will be positioned at the upper back part of the engine, near the firewall. You will need to re-route the OEM female fuel line up here to connect to the new ethanol sensor. NOTE: The sensors from Innovate and from FenFab have pretty short tubes. Once the fittings were connected I was unable to get the disconnect tool back in there. I believe Continental has a sensor with longer tubes. The OEM retaining clip does not reinstall either. I noted the routing of the new fuel line with a red line below.
There are a few 10mm bolts you can use to install the mounting bracket. I used this one. Be careful to not drop anything in the engine bay! To get a little more clearance (height on bracket) I reused the OEM washer in conjunction with the FenFab spacer that is provided.
Tighten down bracket and attach harness. I am going to route this through a pass through one day, but for now it's just routed under the cover. I was getting hangry. Reconnect battery terminal, start car, check for leaks. For the gauge, I passed the wiring through the hood release grommet. It was a bit of a bitch, but got it done. The 12v power to the gauge also powers the ethanol sensor, so no need for power to this actual sensor.
Add-A-Circuit on Fuse #37, upper RH most fuse
Last edited:
-
 4
4
- Show All