• Sign Up! To view all forums and unlock additional cool features

    Welcome to the #1 Explorer ST Forum and Explorer ST community dedicated to Explorer ST owners and enthusiasts. Register for an account, it's free and it's easy, so don't hesitate to join the Explorer ST Forum today!


Focal, Mosconi, Illusion and Helix build

Cruising68

1000 Post Club
Messages
1,384
Reactions
1,029
Points
262
Location
Chicago, IL, USA
Very nice. I own a tool company and I still don't have enough cool tools :(
 

OP
UNBROKEN

UNBROKEN

4000 Post Club
Messages
4,230
Reactions
4,936
Points
352
Location
Houston, TX, USA
Thread Starter #102
Gutted the whole back end and started running some wiring…not exactly what I had planned for it but it’s out of the way and works. The small distro blocks are to pull power for the DSP and lighting. 2958AB95-D1DA-4EB8-AEFB-49EC0B6C412D.jpeg
 

OP
UNBROKEN

UNBROKEN

4000 Post Club
Messages
4,230
Reactions
4,936
Points
352
Location
Houston, TX, USA
Thread Starter #103
Enclosure with top panel built and everything mocked up in place. I don’t love it but I only have so much real estate to work with. Trim panels, wiring and upholstery tomorrow. FEA1A910-1447-4214-9426-DD747C979568.jpeg
 

OP
UNBROKEN

UNBROKEN

4000 Post Club
Messages
4,230
Reactions
4,936
Points
352
Location
Houston, TX, USA
Thread Starter #105
Change of plans. C001F9DC-6B51-4E48-8A6A-EC83AAC90749.jpeg
 

OP
UNBROKEN

UNBROKEN

4000 Post Club
Messages
4,230
Reactions
4,936
Points
352
Location
Houston, TX, USA
Thread Starter #106
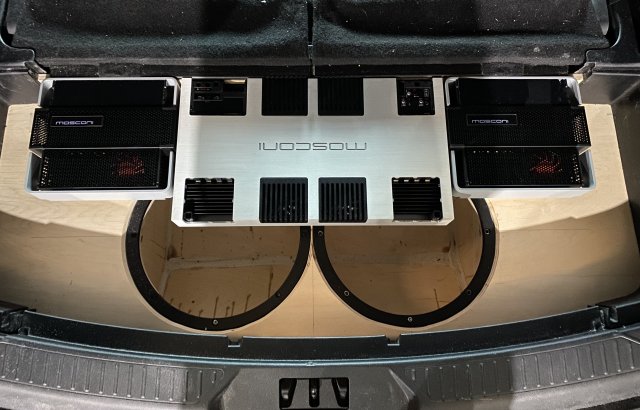
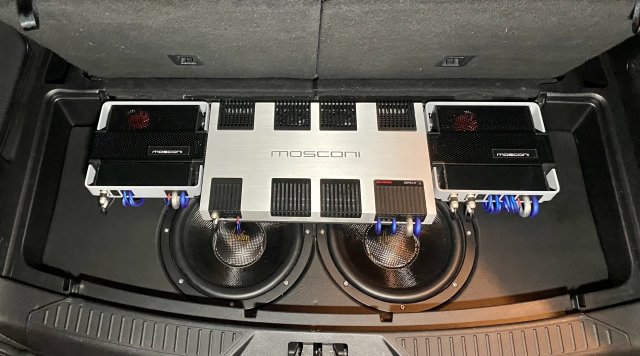
All I wanted today was to get it in and functioning. I’ll have to build something for cable management later. I have some ideas just ran out of time. Gotta pull it out again anyway…I guess when I dropped one of the subs in the speaker wire is close to the cone…that makes a nice noise. lol 534FAC30-611B-494E-90A4-1874CB5053FA.jpeg
 

Cruising68

1000 Post Club
Messages
1,384
Reactions
1,029
Points
262
Location
Chicago, IL, USA
I like this look better than the other one.
 

Messages
66
Reactions
38
Points
17
Location
Yorba Linda CA
It sucks that the brand name wouldn't allow a clean install unless the name was upside down. Either way, I would know it was upside down and it would bug me not seeing it, and would bother me with the cables up front. I look forward to seeing what you do with them, looks great though with some great components
 

OP
UNBROKEN

UNBROKEN

4000 Post Club
Messages
4,230
Reactions
4,936
Points
352
Location
Houston, TX, USA
Thread Starter #109
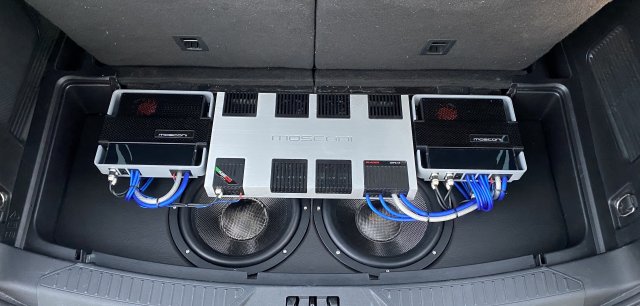
I had new emblems made for the Pro’s when I had them flipped backwards…that was easy. The Zero 3 has it carved in though…not so easy. I have some connections at Orca Design…gonna see if I can get my hands on a trashed case from a AS, Zero or One amp and cut the emblem out to make my own badge. Maybe polish it or something. I’ll still built something for cable management in the next week or so when I find some time.
 

OP
UNBROKEN

UNBROKEN

4000 Post Club
Messages
4,230
Reactions
4,936
Points
352
Location
Houston, TX, USA
Thread Starter #110
Drawing up an amp mounting plate today to be cut out of 1/8” aluminum then the amps will be on 1/2” spacers so the wires can turn and run straight in under them. That should clean it up nice. I’ll sleeve all the wires and I think it’ll be presentable.
 

Messages
51
Reactions
10
Points
7
Location
IL
I was just going to ask how you are planning on mounting them. I remember seeing metal of some type on the last build, I want to do something similar but they need to be super secure. You could have a CF emblem made for the amp as long as that part of the heat sink doesn't get hot.
 

OP
UNBROKEN

UNBROKEN

4000 Post Club
Messages
4,230
Reactions
4,936
Points
352
Location
Houston, TX, USA
Thread Starter #112
Had to wait on a tiny M3 x 0.5 tap but slow progress is still progress. And damn I hate drilling acrylic. D81A6297-8008-4D75-AC9A-DB4BF76C0683.jpeg BCED72E2-CA7E-44BC-8CB6-D8DFE7D5DE69.jpeg
 

OP
UNBROKEN

UNBROKEN

4000 Post Club
Messages
4,230
Reactions
4,936
Points
352
Location
Houston, TX, USA
Thread Starter #113
3/16” aluminum plate for the amps courtesy of a buddy with a waterjet. 3B4579CB-40B0-459F-B814-8BEB61F2343B.jpeg
 

OP
UNBROKEN

UNBROKEN

4000 Post Club
Messages
4,230
Reactions
4,936
Points
352
Location
Houston, TX, USA
Thread Starter #114
My techflex and shrink wrap didn’t make it this week but I still wanted to see it closer to complete. I think it’ll work just fine once all the wires are sleeved black.
4F4061D2-FE1C-47BB-9D8B-1C748B3344DB.jpeg
 

OP
UNBROKEN

UNBROKEN

4000 Post Club
Messages
4,230
Reactions
4,936
Points
352
Location
Houston, TX, USA
Thread Starter #115
Did some hacking and got the mounting cups epoxied into place. Next weekend will be fiberglass, bondo and lots of sanding….maybe some paint. They’re aimed at opposite headrests…the look weird in the pics.
A28E8473-C560-4A74-BBD6-FB2F18BB4906.jpeg E1F618F8-DDE7-41DC-8CF0-E5F9D84A42B4.jpeg E37C616C-1D7E-4A51-8F61-CB9FED06BE99.jpeg 3405BE8A-6542-4F68-B3BA-5D7AD28EDE4E.jpeg 979866F7-0D4F-477F-AEA8-36A744B6A2FF.jpeg E6554043-9BC9-44DE-B448-7EA35DDD6500.jpeg
 

OP
UNBROKEN

UNBROKEN

4000 Post Club
Messages
4,230
Reactions
4,936
Points
352
Location
Houston, TX, USA
Thread Starter #116
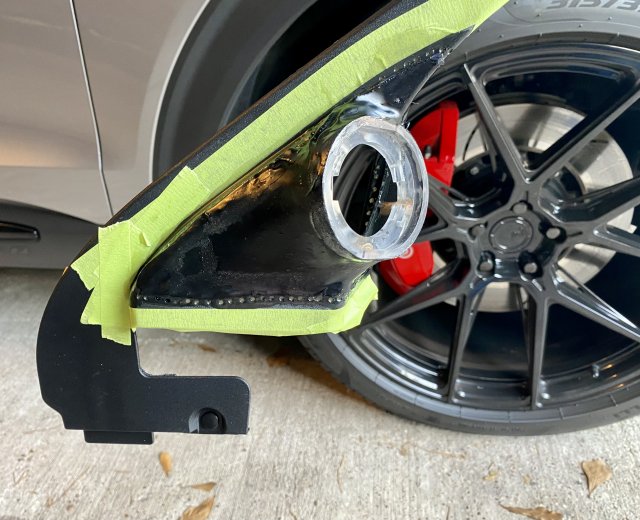
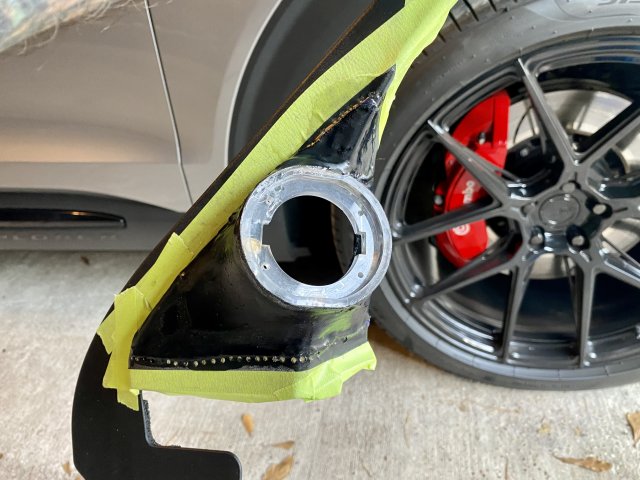
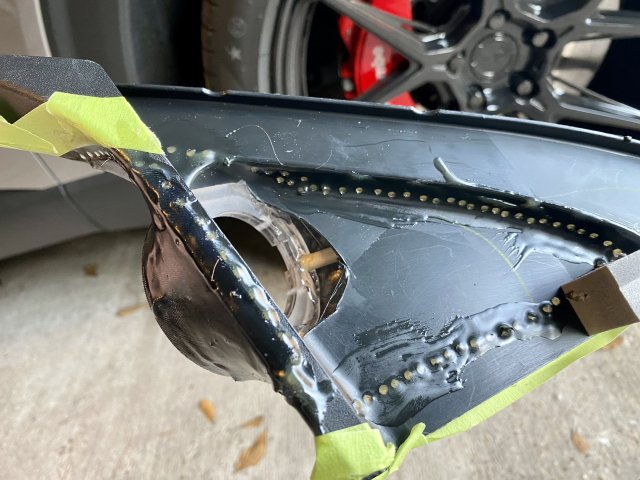
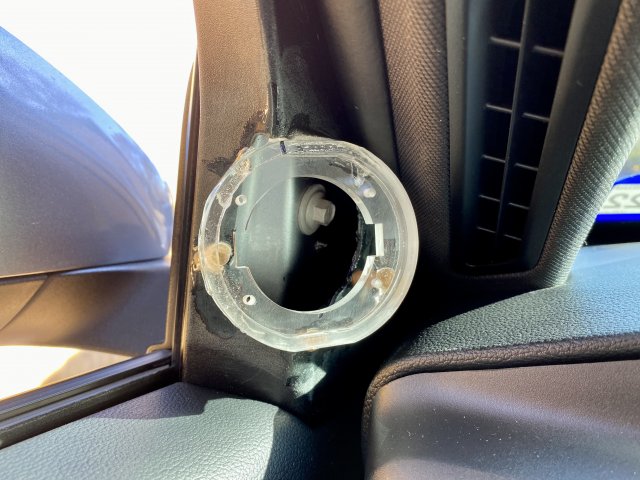
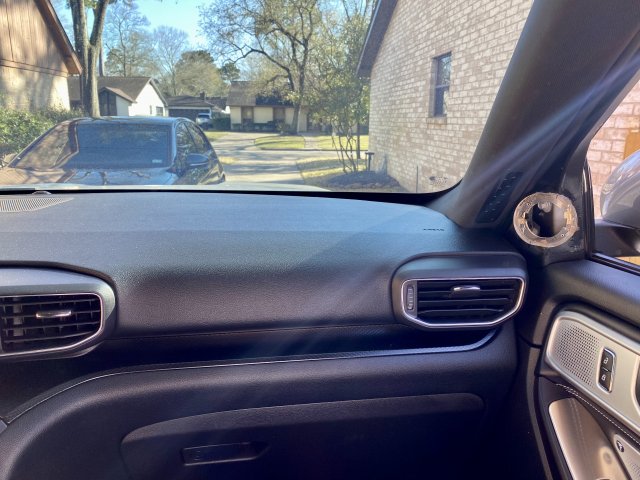
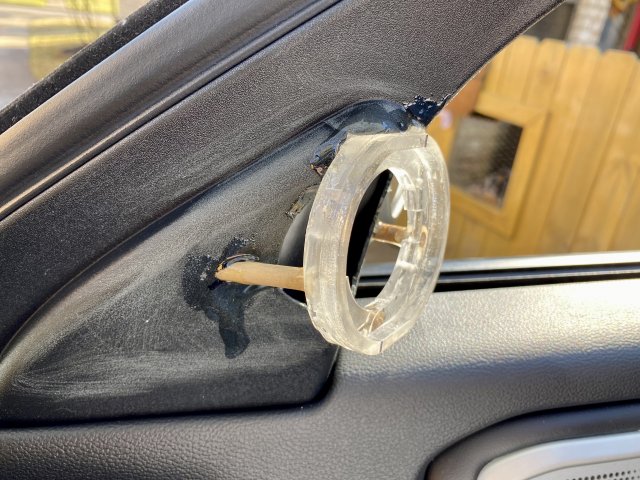
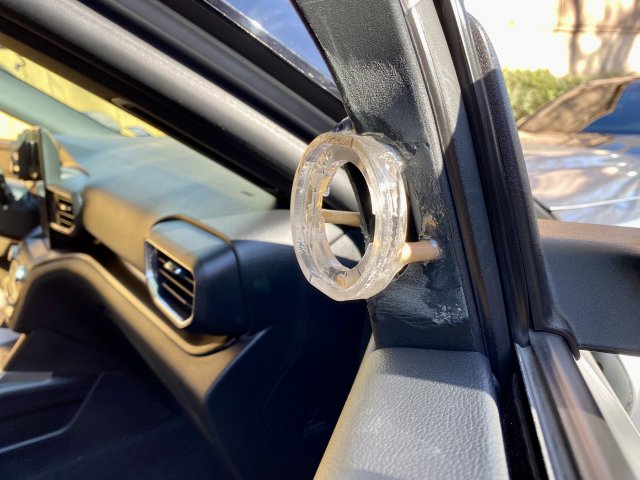
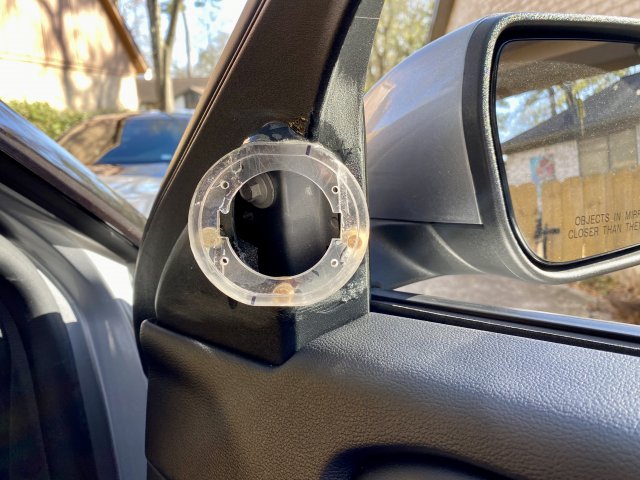
Cloth stretched and coated in resin. No going back now. Fiberglass tomorrow night then sore arms on Saturday….lots of sanding to do.
8BBDC755-9D5E-4F82-937C-194BEC6BACC2.jpeg 5C020A54-91FE-46B6-AAFB-387CEB9006BE.jpeg 1E6603E6-F605-4EA5-8944-F2367783E71D.jpeg
 

Nbk4t5e

Active Member
Messages
852
Reactions
550
Points
232
Location
San Antonio, TX, USA

Cruising68

1000 Post Club
Messages
1,384
Reactions
1,029
Points
262
Location
Chicago, IL, USA
Agreed! I just don't have the patience for that level of detail. Impressive to watch for sure.
 

TMac

1000 Post Club
Messages
1,695
Reactions
1,454
Points
262
Location
Knoxville, TN
Is the impregnated cloth secured by tiny rivets? Or are those some other type of fastener? I've seen some fiberglass work before, but nothing like that! I would have expected hand shaped foam so that's not a technique I've seen before. In any case, impressive work and very labor intensive!
 

OP
UNBROKEN

UNBROKEN

4000 Post Club
Messages
4,230
Reactions
4,936
Points
352
Location
Houston, TX, USA
Thread Starter #120
This is the way it’s done with audio builds. Resin doesn’t bite to plastic very well so you drill tons of small holes for it to pass through to make a mechanical connection. The cloth is put in place first with hot glue so you can move it if needed then after it’s trimmed you hit the edges with CA glue then resin over everything and into the holes. I’ll add a few layers of chop mat and resin tomorrow then knock down any high spots on Saturday and start with body filler.
 

Explorer ST Posts


Top