-
Sign Up! To view all forums and unlock additional cool features
Welcome to the #1 Explorer ST Forum and Explorer ST community dedicated to Explorer ST owners and enthusiasts. Register for an account, it's free and it's easy, so don't hesitate to join the Explorer ST Forum today!
UNBROKEN’s Iconic Silver ST build
- Thread starter UNBROKEN
- Start date
OP
Thread Starter
#44
Thread Starter
#44
I’m throwing these in tomorrow morning. I can’t hardly wait. I also got my painted emblems here and I’m almost finished with the base for my wired ProClip phone holder I threw the rear emblem on and blacked out the ST grille emblem...gonna finish the phone holder and install the front emblem this weekend. Pics to follow.
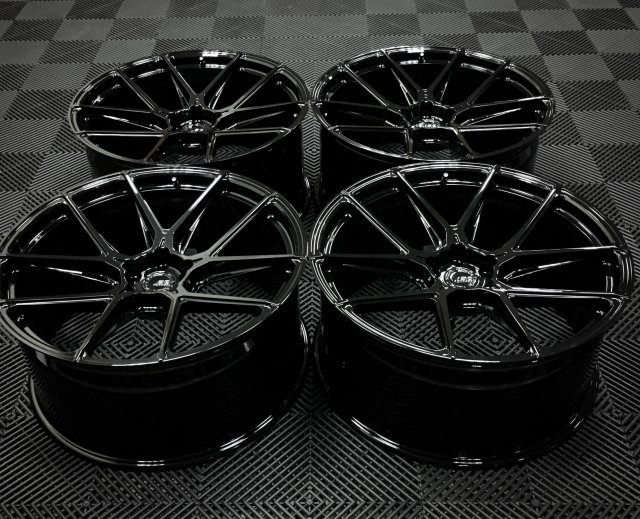
Oh yea...wheels will be completed mid week next week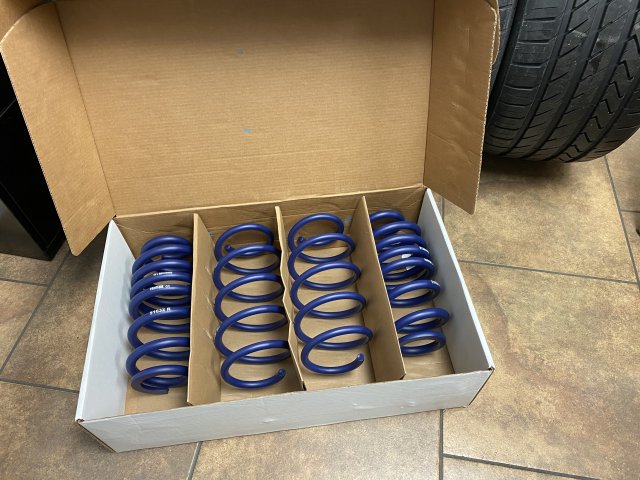
Oh yea...wheels will be completed mid week next week
-
 3
3
- Show All
OP
Thread Starter
#45
OP
Thread Starter
#46

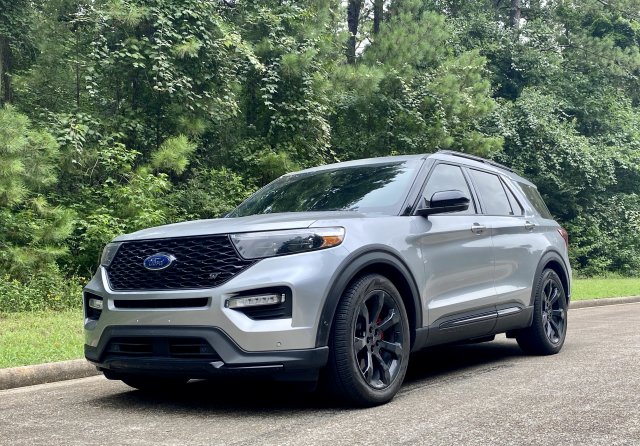
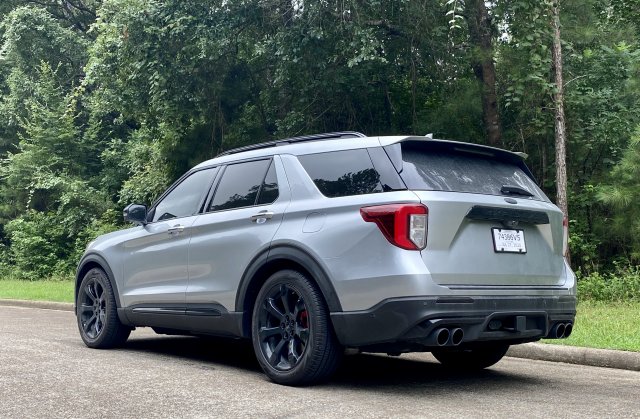
It’s filthy but it’s dropped. Maybe it’ll quit raining in Houston sometime this year and I’ll wash it.
View attachment 1178
View attachment 1179
View attachment 1180
OP
Thread Starter
#51
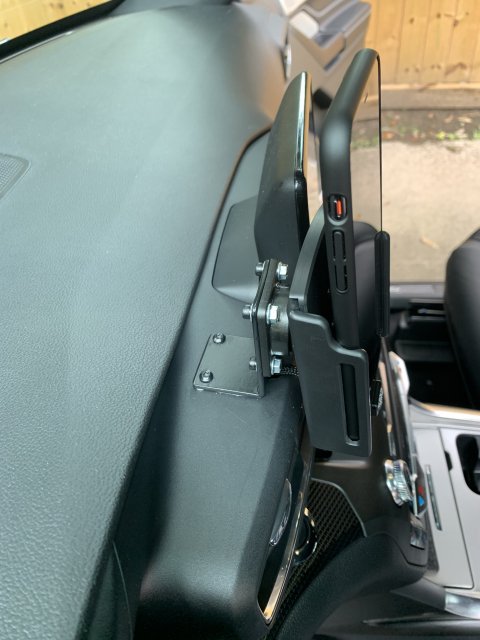
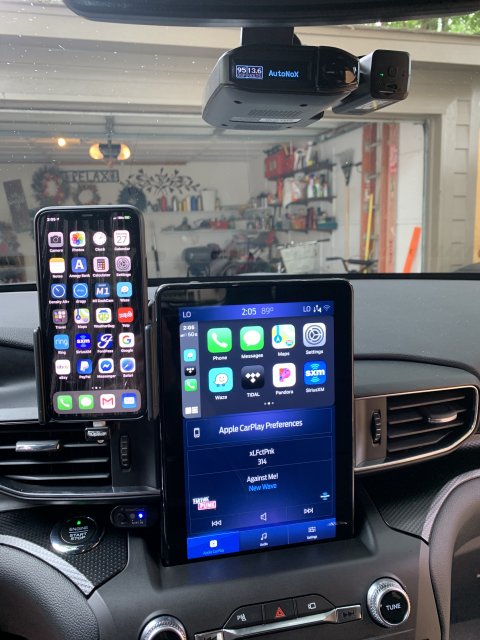
ProClip wired phone holder and custom mount completed. I even took a second to Techflex the wire. lol
I hate wires hanging all over the place...so this was my solution. View attachment 1192 View attachment 1193
I hate wires hanging all over the place...so this was my solution. View attachment 1192 View attachment 1193
Where did you get the bracket you screwed in, and how did you run the wires?
Sent from my iPhone using Tapatalk Pro
OP
Thread Starter
#53
Thread Starter
#53
I made the bracket at work from 3/16” flat stock. I ran the wire into the dash just in front of the bracket and fished it out to the steering column then ran a fish tape from inside the cubby, then pulled the wire back through. I was surprised at how easy everything fed into place. I couldn’t care less about drilling the dash panel or having to use plastic screws to hold the bracket...I just wanted it to work and 3M VHB tape alone wasn’t cutting it.
-
1
- Show All
I made the bracket at work from 3/16” flat stock. I ran the wire into the dash just in front of the bracket and fished it out to the steering column then ran a fish tape from inside the cubby, then pulled the wire back through. I was surprised at how easy everything fed into place. I couldn’t care less about drilling the dash panel or having to use plastic screws to hold the bracket...I just wanted it to work and 3M VHB tape alone wasn’t cutting it.
Sent from my iPhone using Tapatalk Pro
OP
Thread Starter
#55
Thread Starter
#55
Installed the oemautoart front emblem on along with an ST emblem black out inlay that I found for $5 on eBay.
And now I’m gonna show you how to cheat. Technically you’re supposed to remove the whole damn front end to swap the oval. It’s too damn hot outside and I’m too damn lazy for all that. They send you a template to mark and drill for the new alignment pins...but they also have the old ones marked on the template...so I put both to work. A 1/4” drill bit right down the original pin locations to cut the pins off and the emblem just falls off. Drill for the new pins and get creative with some 3M VHB tape and you don’t even have to open the hood. I saved the nuts and I’ll throw them on when I install the intercooler. Done in 30 minutes.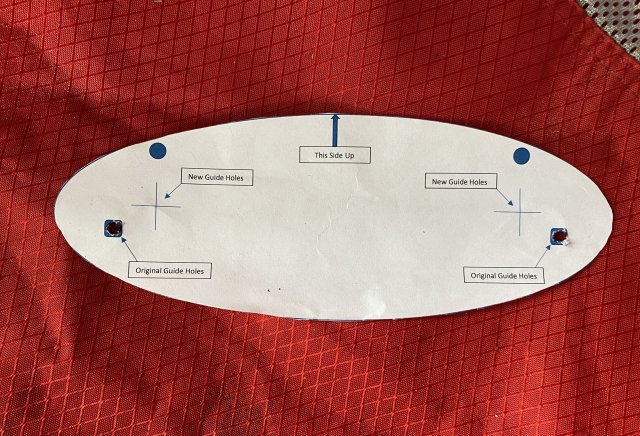
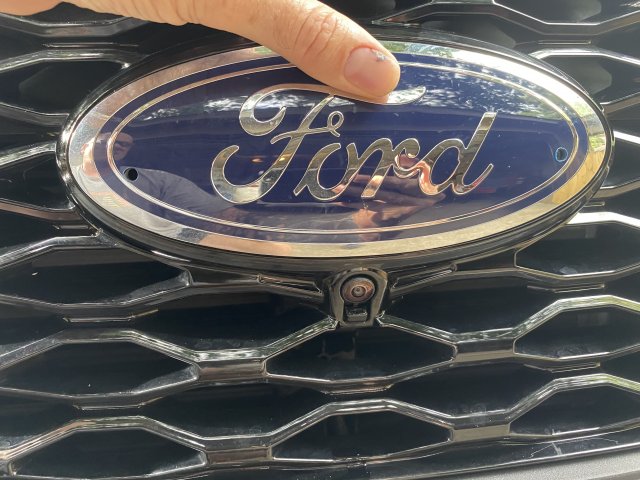
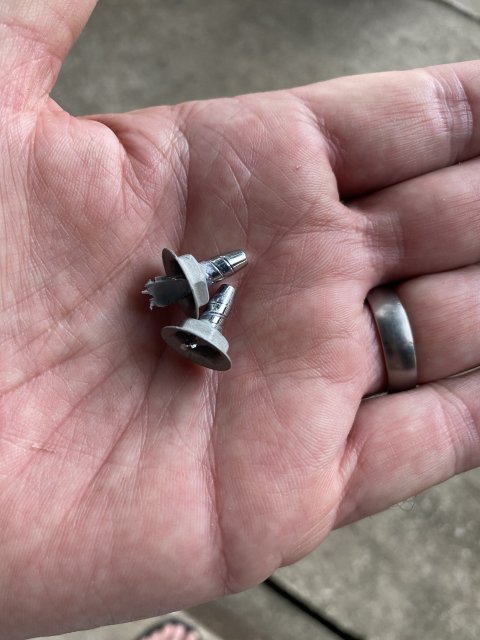

And now I’m gonna show you how to cheat. Technically you’re supposed to remove the whole damn front end to swap the oval. It’s too damn hot outside and I’m too damn lazy for all that. They send you a template to mark and drill for the new alignment pins...but they also have the old ones marked on the template...so I put both to work. A 1/4” drill bit right down the original pin locations to cut the pins off and the emblem just falls off. Drill for the new pins and get creative with some 3M VHB tape and you don’t even have to open the hood. I saved the nuts and I’ll throw them on when I install the intercooler. Done in 30 minutes.
-
3
- Show All
")
OP
Thread Starter
#58
Thread Starter
#58
File this under crap that bugs me but maybe not you...but I fixed it anyway.
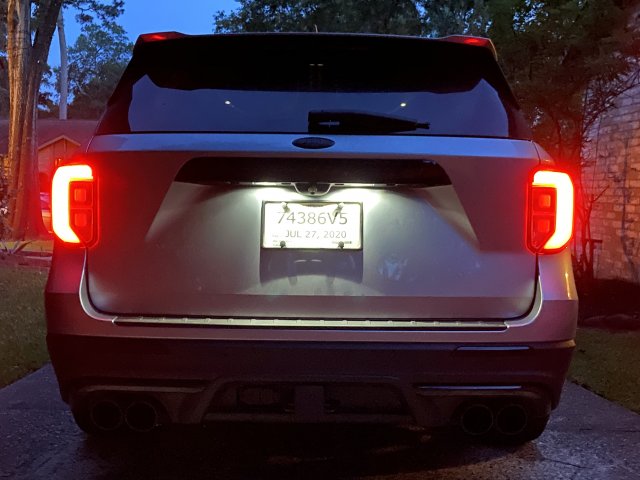
The oem plate light housings both face the same way. Probably not an issue with an incandescent bulb but if you swap in LED’s you wind up with the left light facing the plate and the right light facing nothing that needs to be lit up. If you wanna fix it, pop the housing out and look at the little indent where the snap locks it into place. Now take a razor knife and trim a heavy 1/8” off just above and below the indent. Flip the housing around and snap it back into place. Trim small amounts and don’t blame me if you fat finger it. lol
Top to bottom:
Stock
Lights facing same direction
Modified
Lights facing each other like they should.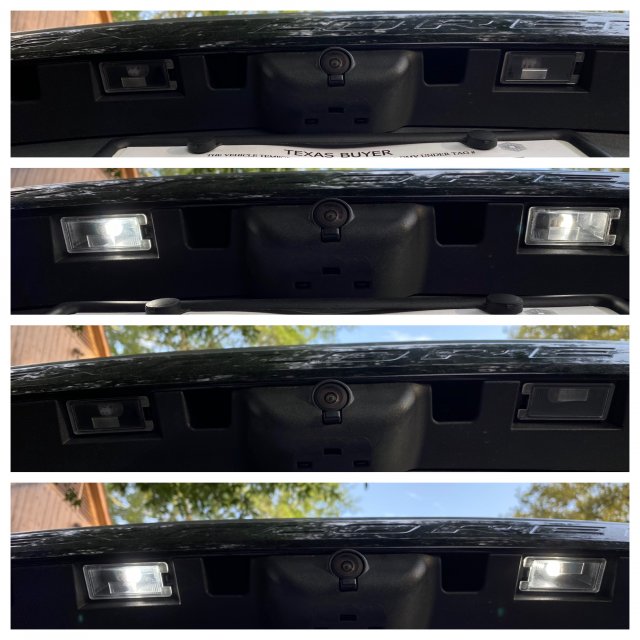
-
11
- Show All
OP
Thread Starter
#59
OP
Thread Starter
#60