
2023 Ford Explorer ST brand new.
I recently spent 8 hours installing and troubleshooting the naviks 360 camera and nav speed bypass, aka using the cameras at a speed faster than 5mph, eg drive through, tight intersections, small parking lots.
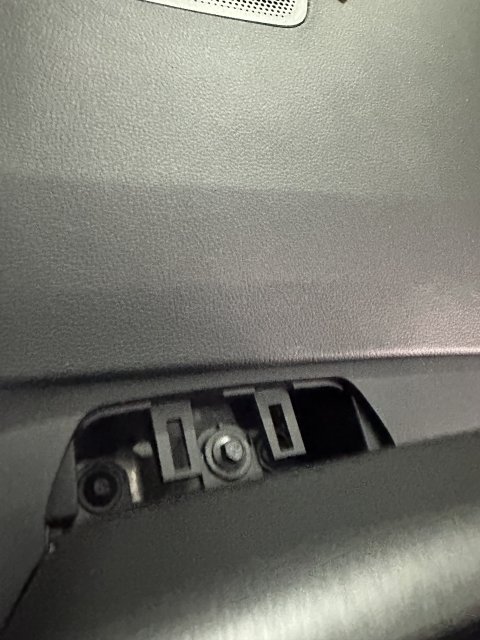
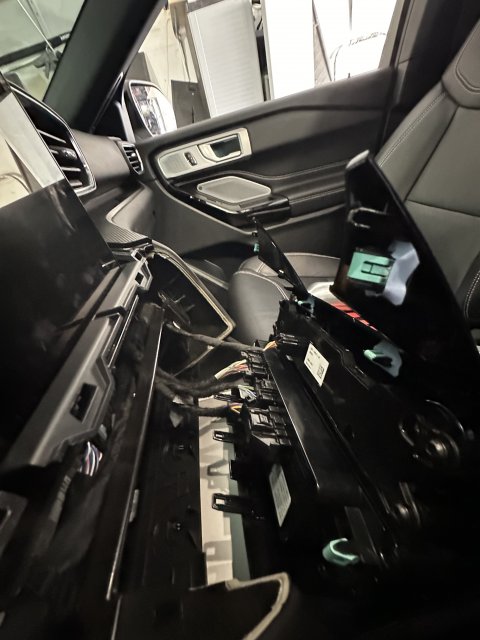
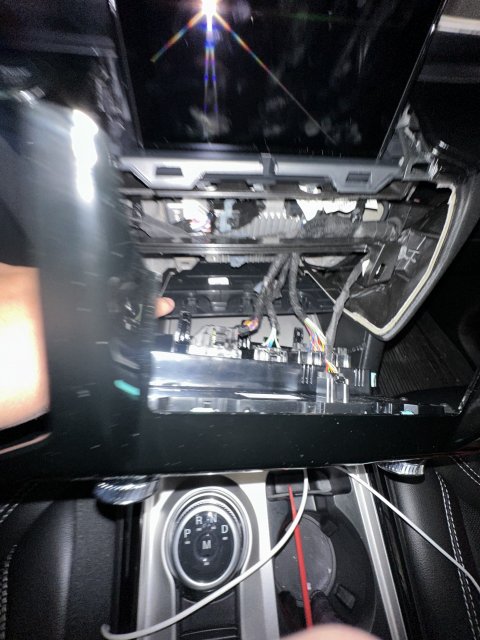
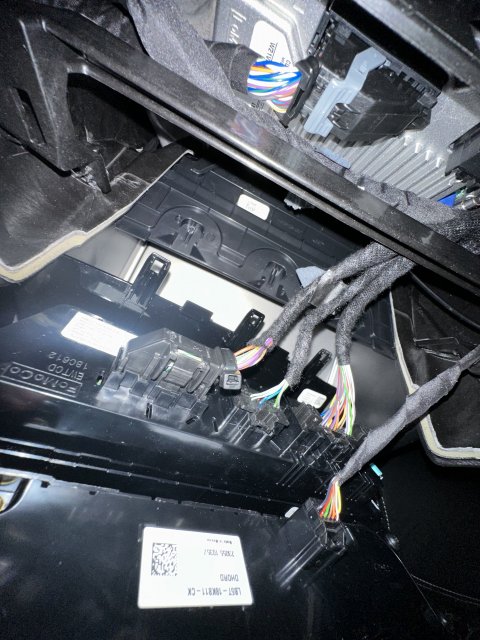
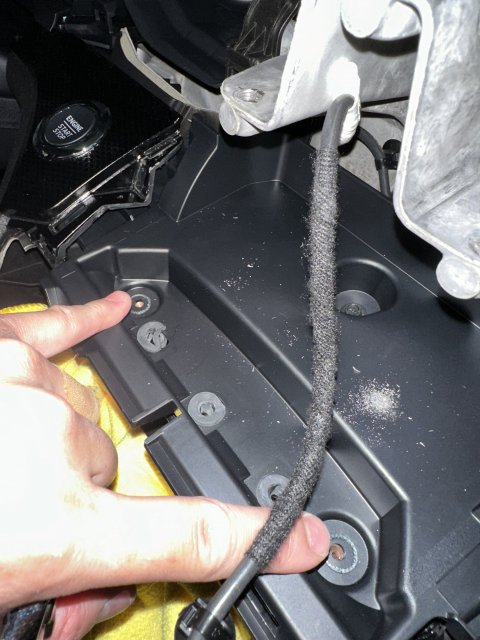
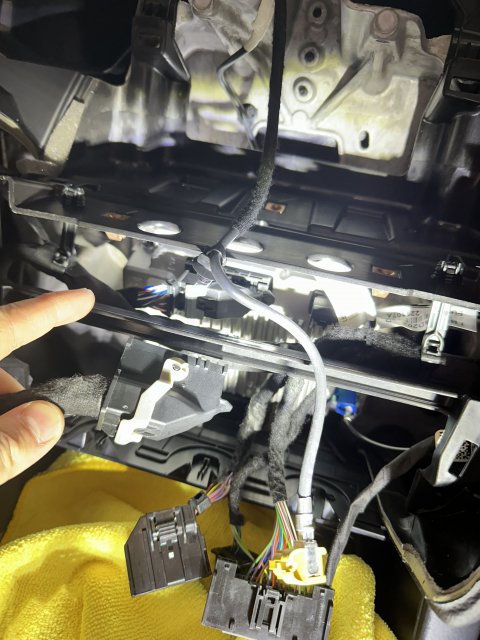
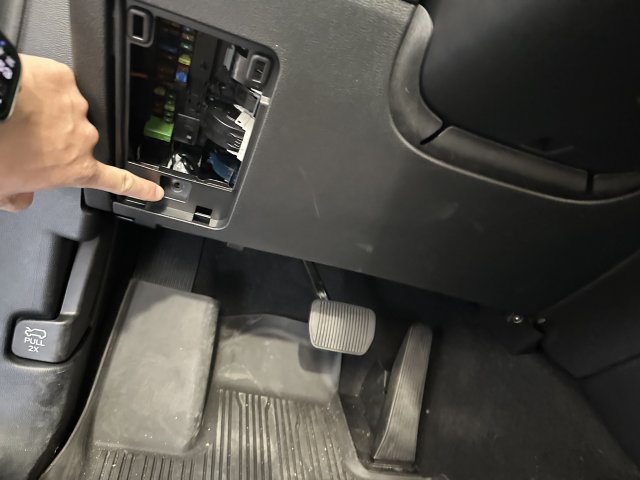
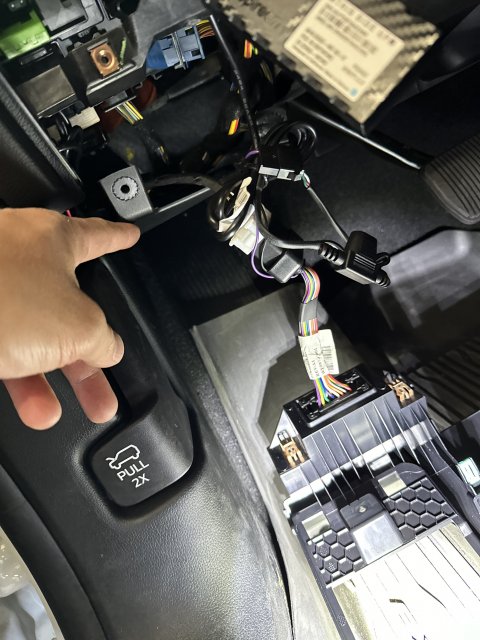
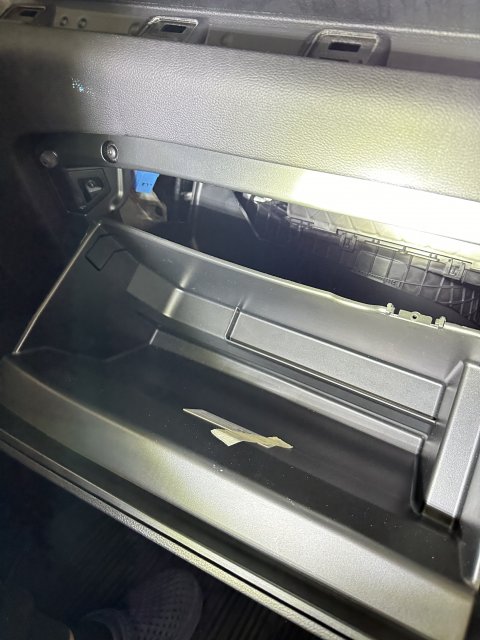
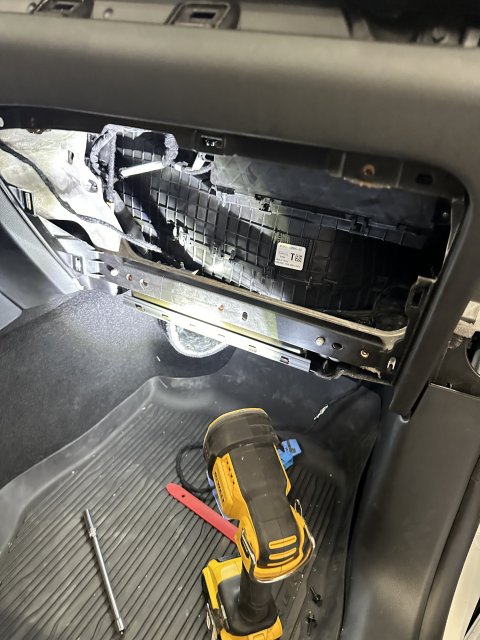
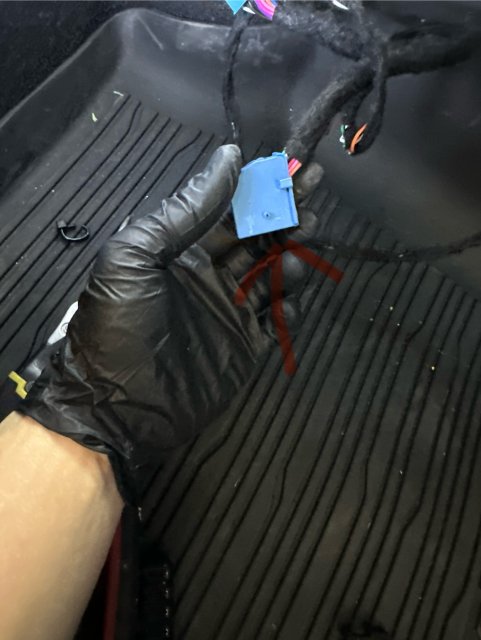
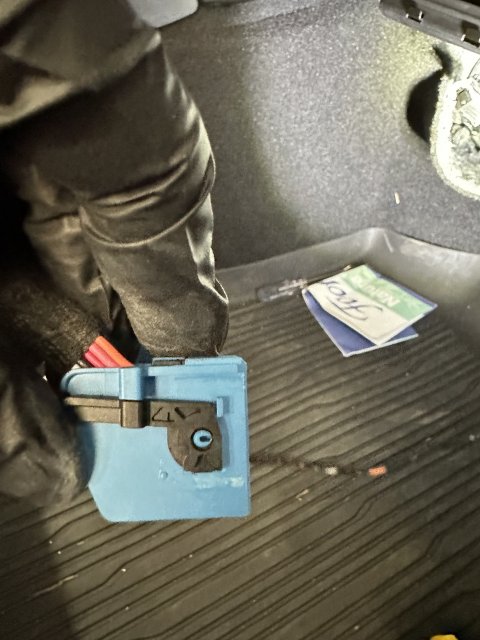
1. I took apart the dash from driver to passenger including the glove, monitor, drive plastic cover because I was told the video interface unit maybe behind the monitor, on driver side footwell, and then I found it on the passenger side footwell. In the process I found a dealer installed lojack connected to the obd port, which you can just disconnect. I also removed the glove in hopes of an easy way to reach the video unit, dont bother, you can’t get to it.
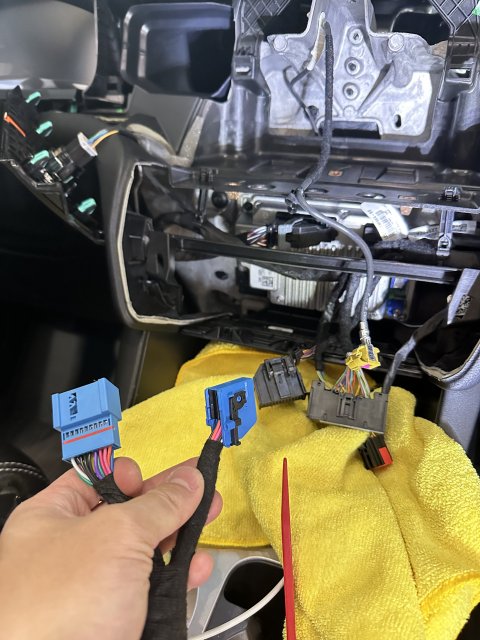
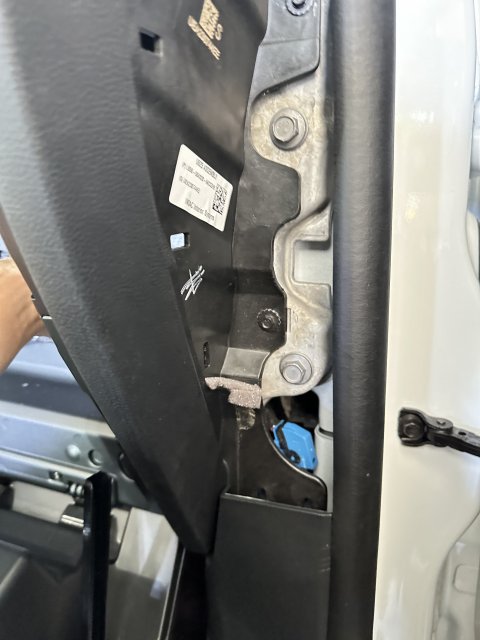
2. The biggest pain points are disconnecting the connector to the video unit under passenger footwell. It requires using a L shape pick and a small screwdriver and getting under the glove compartment while pushing the lock and clasp at the same time.
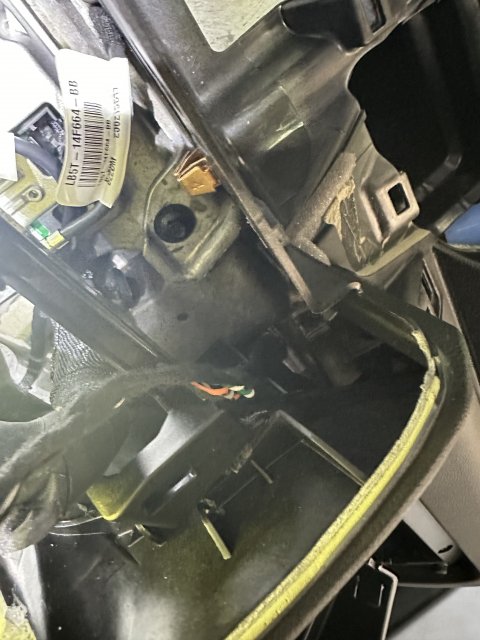
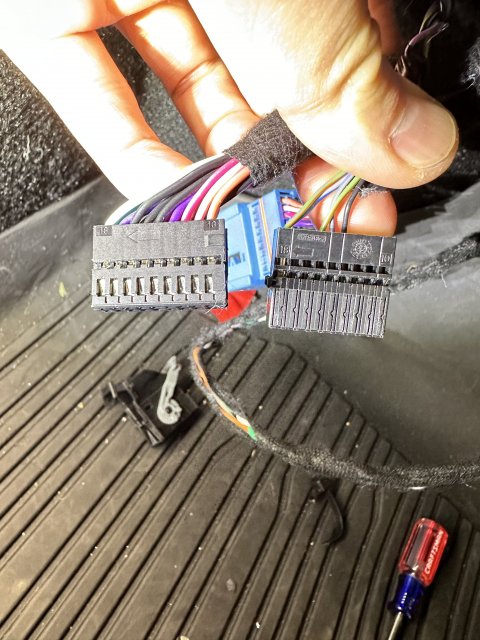
3. The second pain point was the connector was significantly shorter and therefore had to be modified by removing the (cutting) clasp and nubbin holding the clasp in order to make a good connection. This was discovered because when I first connector the navik unit it worked sometimes but not always and took 3 days of troubleshooting with naviks, which included selectively connecting things, and a voltimeter to determine connectivity. Either way navik was very helpful. Navik is replacing the connector and sending a new unit, pending when they get it in stock and will have the correct part number moving forward for any else ordering, your welcome.
4. Process
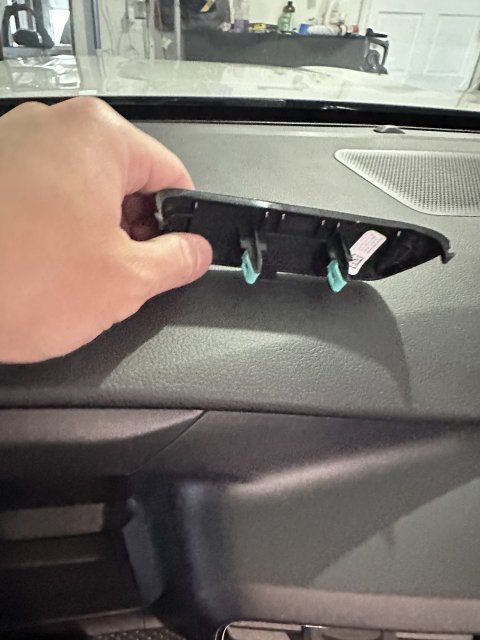
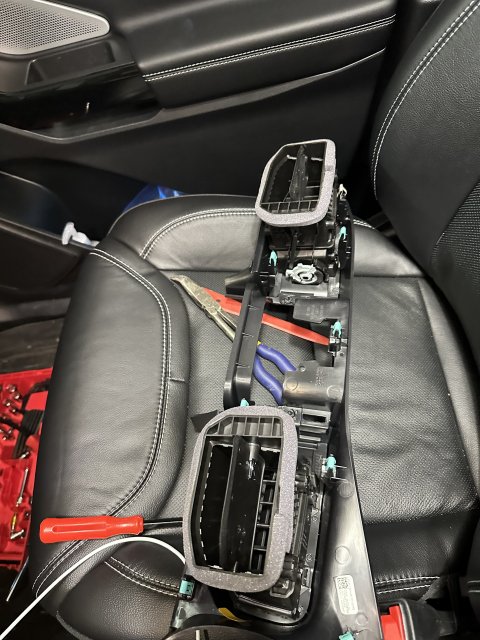
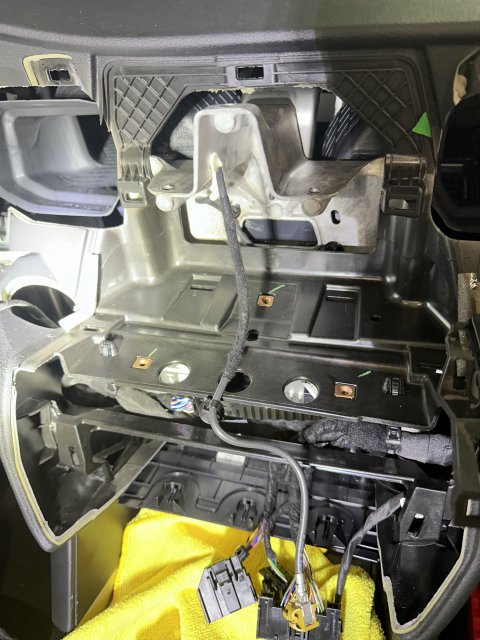
a. I recommend only removing the ac controls and glove (if you want to route the cable cleanly).
b. Removing the ac controls is extremely easy, pull from the bottom and up, there’s a youtube video online of it for a monitor upgrade.
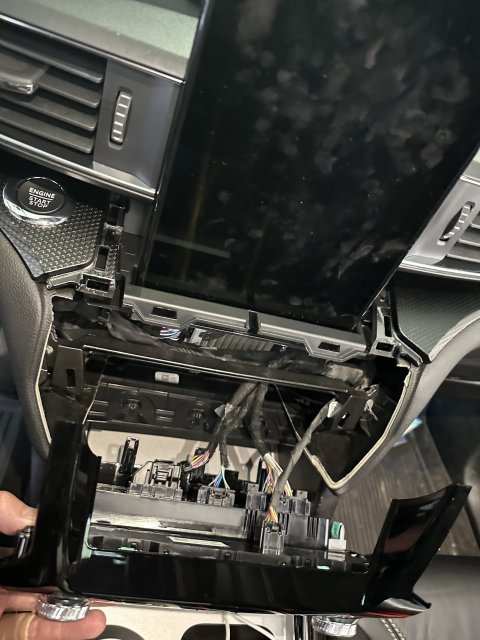
c. Reinstalling the ac controls is difficult, its a manner of lining up the top corners at a angle and push the tabs until you hear a click.
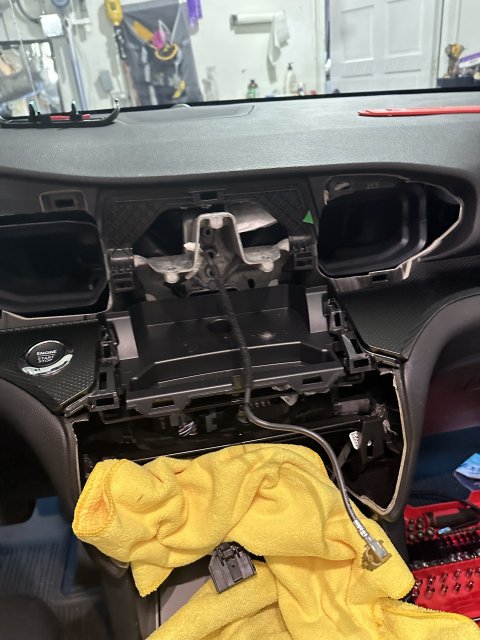
d. installing the unit is very straightforward disconnect and plug in, stuff cleanly so you can stuff the controls back on, route the video unit to the right as you please to not look bad
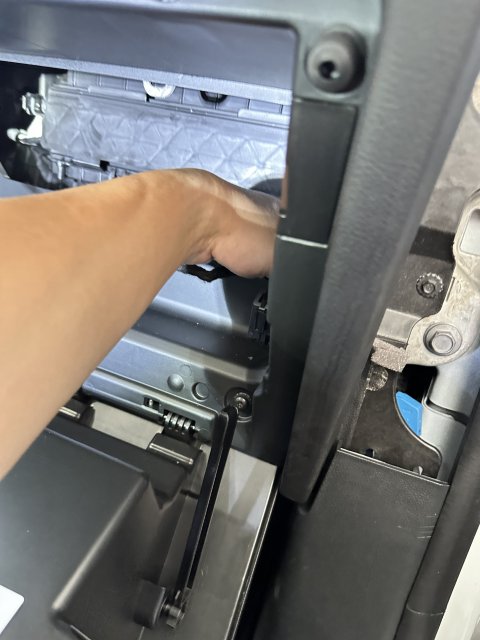
e. the video unit is behind the carpet, use a screwdriver and L shape pick to release the latch.
5. Enjoy not curbing your rims above 5mph
6. Lastly if your usb port is lighting up but carplay isn’t working, something is disconnected, naviks helped me troubleshoot that.
I recently spent 8 hours installing and troubleshooting the naviks 360 camera and nav speed bypass, aka using the cameras at a speed faster than 5mph, eg drive through, tight intersections, small parking lots.
1. I took apart the dash from driver to passenger including the glove, monitor, drive plastic cover because I was told the video interface unit maybe behind the monitor, on driver side footwell, and then I found it on the passenger side footwell. In the process I found a dealer installed lojack connected to the obd port, which you can just disconnect. I also removed the glove in hopes of an easy way to reach the video unit, dont bother, you can’t get to it.
2. The biggest pain points are disconnecting the connector to the video unit under passenger footwell. It requires using a L shape pick and a small screwdriver and getting under the glove compartment while pushing the lock and clasp at the same time.
3. The second pain point was the connector was significantly shorter and therefore had to be modified by removing the (cutting) clasp and nubbin holding the clasp in order to make a good connection. This was discovered because when I first connector the navik unit it worked sometimes but not always and took 3 days of troubleshooting with naviks, which included selectively connecting things, and a voltimeter to determine connectivity. Either way navik was very helpful. Navik is replacing the connector and sending a new unit, pending when they get it in stock and will have the correct part number moving forward for any else ordering, your welcome.
4. Process
a. I recommend only removing the ac controls and glove (if you want to route the cable cleanly).
b. Removing the ac controls is extremely easy, pull from the bottom and up, there’s a youtube video online of it for a monitor upgrade.
c. Reinstalling the ac controls is difficult, its a manner of lining up the top corners at a angle and push the tabs until you hear a click.
d. installing the unit is very straightforward disconnect and plug in, stuff cleanly so you can stuff the controls back on, route the video unit to the right as you please to not look bad
e. the video unit is behind the carpet, use a screwdriver and L shape pick to release the latch.
5. Enjoy not curbing your rims above 5mph
6. Lastly if your usb port is lighting up but carplay isn’t working, something is disconnected, naviks helped me troubleshoot that.
Attachments
-
 1.6 MB Views: 20
 -
 1.2 MB Views: 21
 -
 1.3 MB Views: 22
 -
 1 MB Views: 21
 -
 1.5 MB Views: 21
 -
 1.8 MB Views: 23
 -
 1.9 MB Views: 23
 -
 1.5 MB Views: 22
 -
 1.3 MB Views: 19
 -
 1.4 MB Views: 20
 -
 1.2 MB Views: 19
 -
 1.4 MB Views: 19
 -
 966.1 KB Views: 17
 -
 1.7 MB Views: 17
 -
 1.9 MB Views: 18
 -
 1.7 MB Views: 15
 -
 1.2 MB Views: 15
 -
 1.4 MB Views: 15
 -
 1 MB Views: 14
 -
 1 MB Views: 13
 -
 1.6 MB Views: 12
 -
 1 MB Views: 13
 -
 1.1 MB Views: 13
 -
 1.2 MB Views: 12
 -
 1.6 MB Views: 12
 -
 376.7 KB Views: 13
 -
 1.5 MB Views: 15
 -
 1.3 MB Views: 13
 -
 1.6 MB Views: 12
Last edited:
-
 2
2
- Show All