
-
Sign Up! To view all forums and unlock additional cool features
Welcome to the #1 Explorer ST Forum and Explorer ST community dedicated to Explorer ST owners and enthusiasts. Register for an account, it's free and it's easy, so don't hesitate to join the Explorer ST Forum today!
The Not So Rapid Red Project
- Thread starter patricklb1
- Start date
OP
Thread Starter
#22
Thread Starter
#22
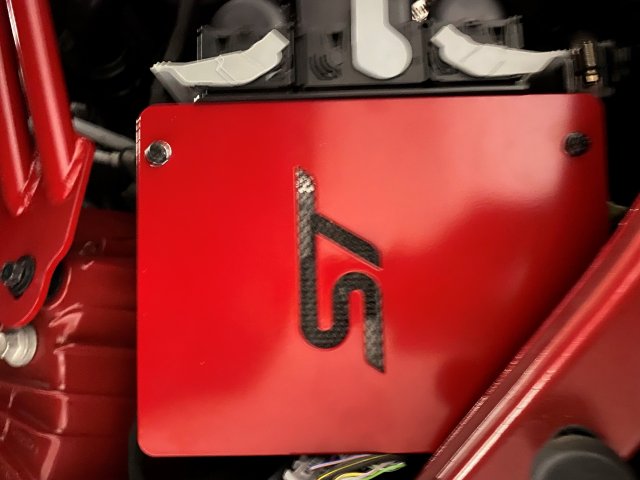
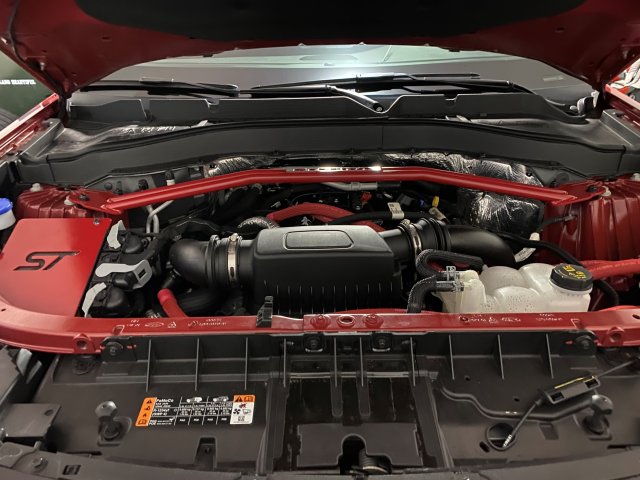
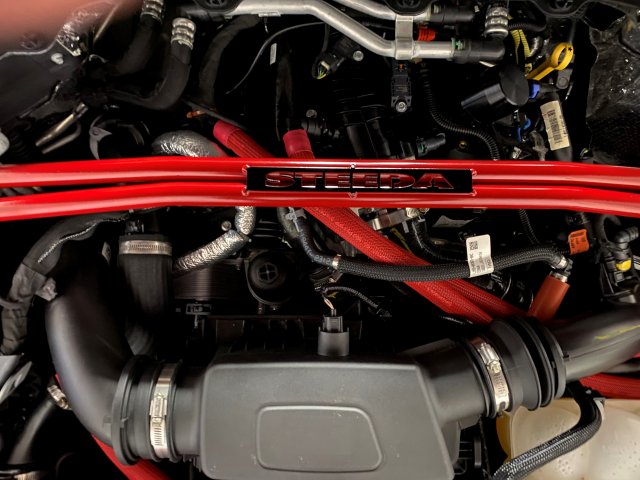
Took the easy route this weekend and did the strut tower brace and the ECU cover. Got a little anal with it with the black mesh behind the ECU cover and painting all the bolts and washers black which held up pretty good until I got around to torqueing the strut tower bolts. Might have to find a way to paint those other bolts now, lol. Steeda sway bar and thermal exhaust are next, probably next weekend.
Attachments
-
 2.1 MB Views: 166
 -
 1.9 MB Views: 167
 -
 1.6 MB Views: 169
-
 4
4
- Show All
OP
Thread Starter
#27
Thread Starter
#27
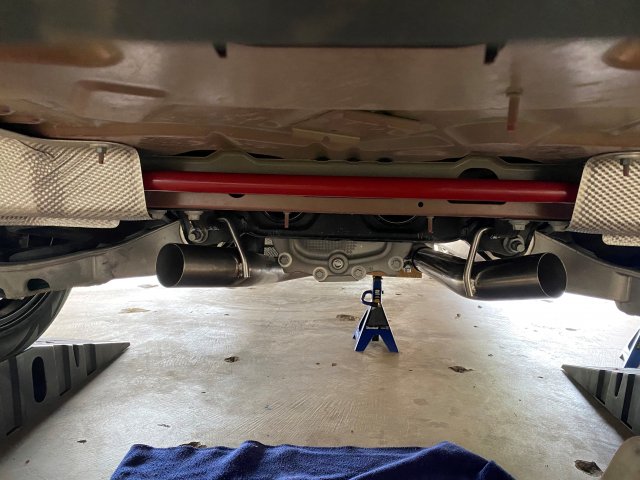
Made a little more progress today with Steeda sway bar and Thermal exhaust installs. If anyone is thinking about doing these two mods, I highly recommend doing them at the same time. I pulled my entire exhaust out first which made the sway bar a lot easier than it looks in the installation video. My only hang up is my ratcheting wrenches only go to 15mm so that part was a little tedious.
I noticed after I had everything put away the mufflers are a little crooked so I'll post rear pics after I get the paint done and straighten the mufflers.
I tried adding a sound clip but it said: The uploaded file is too large for the server to process. I'll have to get a shorter clip.
I noticed after I had everything put away the mufflers are a little crooked so I'll post rear pics after I get the paint done and straighten the mufflers.
I tried adding a sound clip but it said: The uploaded file is too large for the server to process. I'll have to get a shorter clip.
Attachments
-
 2.5 MB Views: 148
-
2
- Show All
I did not take any pictures of the cut studs unfortunately. I measured them for 1-1/8 length because there is a little relief in the back of the rim that allows for a little protrusion past the spacer (see picture). The picture of the studs is the back which were 1-1/4 spacers
I have my springs at the powder coater getting changed to red so as soon as I get them back I will set up an appointment with the dealer to install since I'm going to need alignment with those installed.
That was a lucky break with Lethal, man so many people, myself included, waited months for those damn things.
OP
Thread Starter
#30
Thread Starter
#30
I recently received my ST.. want to keep it showroom clean! How did you go about cleaning your engine?
") .
.
OP
Thread Starter
#31
Thread Starter
#31
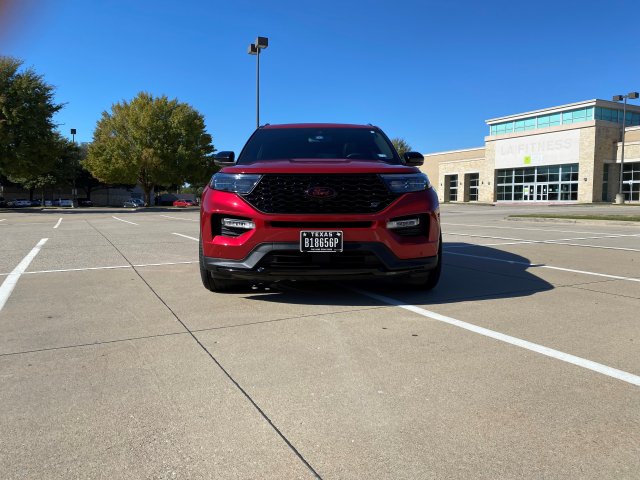
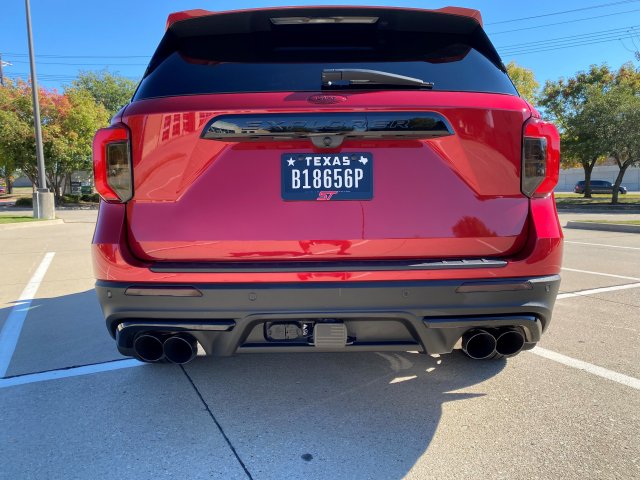
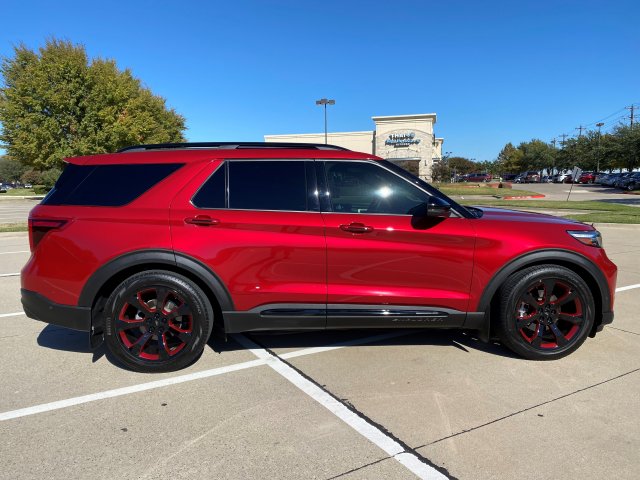
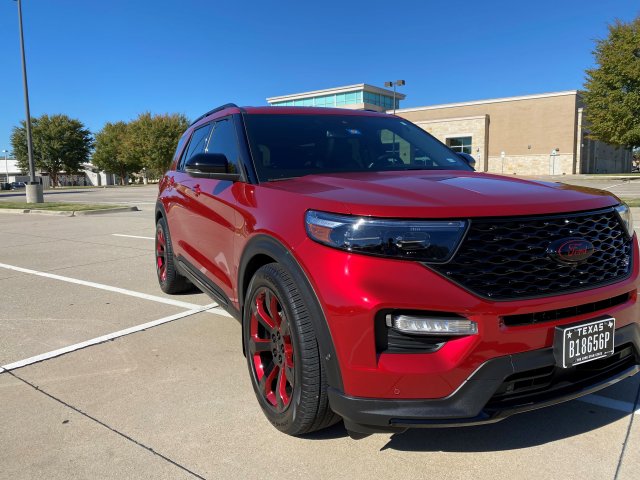
Finally got the H&R springs installed. Also did a cut & polish and ceramic coat, getting ready for those harsh TX winters, lol. Time to give the credit card a little break while I contemplate how far I want to go with performance parts. CAI is a definite addition but I'm not sure beyond that.
Attachments
-
 2.9 MB Views: 134
 -
 2.5 MB Views: 121
 -
 3.1 MB Views: 135
 -
 2.6 MB Views: 144
 -
 2.3 MB Views: 138
 -
 2.3 MB Views: 135
-
5
- Show All

Finally got the H&R springs installed. Also did a cut & polish and ceramic coat, getting ready for those harsh TX winters, lol. Time to give the credit card a little break while I contemplate how far I want to go with performance parts. CAI is a definite addition but I'm not sure beyond that.
-
1
- Show All
OP
Thread Starter
#36
Thread Starter
#36
Looks great! Did you do the polish and ceramic coat yourself? Looking into getting mine done.
-
1
- Show All
Yes, I did. I see some of the prices that people paid and I just couldn't get myself to pay that. I've seen as high as $2000. I bought a Meguiar's MT300 DA polisher and Meguiar's M210 and M110 compounds. I bought the polisher direct from them and the compounds and backing plate on Amazon because the pricing was way better. I'm in around $550 and my time, plus I have everything I need to do it again when needed. With the DA it's really hard to mess up the paint. The hardest, and most time consuming, part is the masking. I used NexGen ceramic coating. I keep seeing it on FB and figured I'd give it a try even though I don't like their "pitchman", lol. The stuff is so easy to apply it's like washing your windows. Mist it on and then buff it to a shine until you see no streaks. Did I do a $2000 job? Probably not, but it looks waaaaaaay better than before I did it. All the little scratches and swirls are gone and it has a great shine. FYI, I have never done anything like this before, this was a first for me.
-
1
- Show All
OP
Thread Starter
#38
Thread Starter
#38
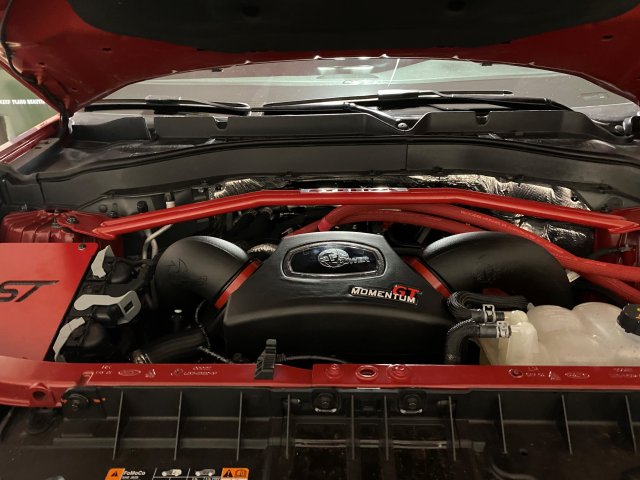
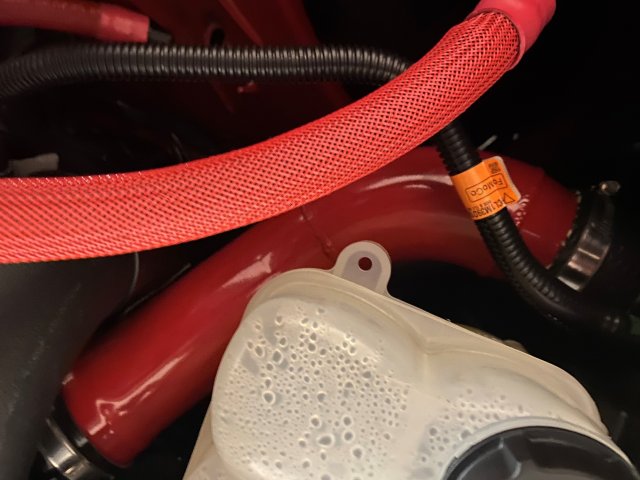
Received my aFe CAI and tackled that little project. The majority of it was pretty straight forward and simple. Just when I thought I was going to cross the finish line I hit a snag. The last thing to do, before connecting all the sensors, is put the bypass valve hose on to the aFe driver side intake tube. It has one of those spring clamps and I struggled with it forever. I couldn't get the thing to open up enough to get over the lip on the tube on the aFe. Fortunately, it's not a high-pressure connection so I eventually just put the hose on and went to Home Depot and bought a worm gear clamp. Done in 2 minutes after that. I couldn't stop myself from making a little mod by painting the clamps, lol. I'm not big on doing things twice so I've been sitting on my FenFab charge pipe, so I also got that installed at the same time. I was able to talk myself out of painting those clamps because they're not very visible and I didn't want to sit around waiting for the paint to dry.
-
2
- Show All
Received my aFe CAI and tackled that little project. The majority of it was pretty straight forward and simple. Just when I thought I was going to cross the finish line I hit a snag. The last thing to do, before connecting all the sensors, is put the bypass valve hose on to the aFe driver side intake tube. It has one of those spring clamps and I struggled with it forever. I couldn't get the thing to open up enough to get over the lip on the tube on the aFe. Fortunately, it's not a high-pressure connection so I eventually just put the hose on and went to Home Depot and bought a worm gear clamp. Done in 2 minutes after that. I couldn't stop myself from making a little mod by painting the clamps, lol. I'm not big on doing things twice so I've been sitting on my FenFab charge pipe, so I also got that installed at the same time. I was able to talk myself out of painting those clamps because they're not very visible and I didn't want to sit around waiting for the paint to dry.
View attachment 10349
View attachment 10350
Sent from my iPhone using Tapatalk
Last edited:
-
1
- Show All
OP
Thread Starter
#40
Thread Starter
#40
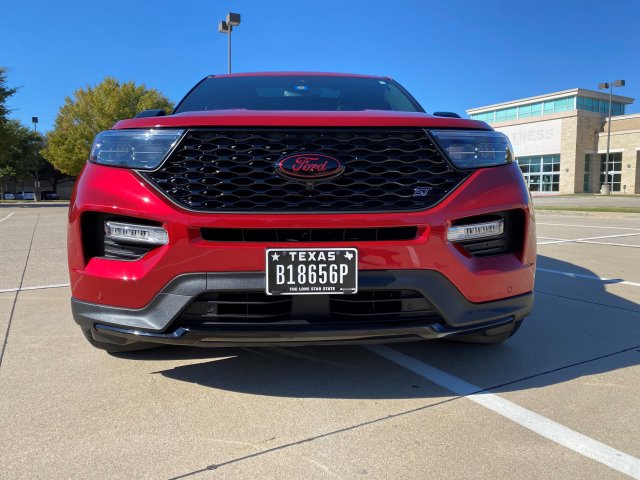
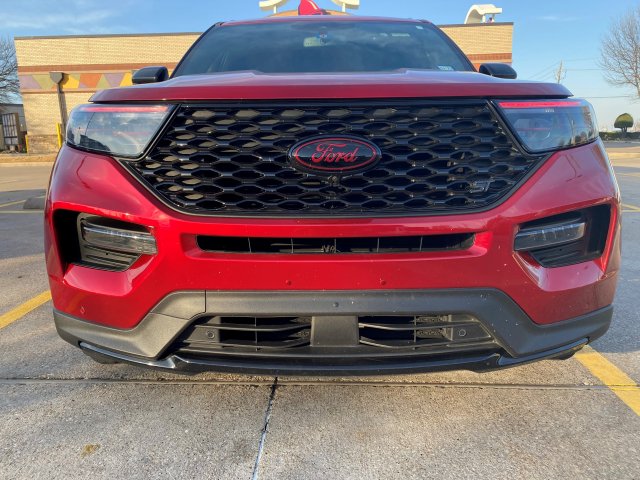
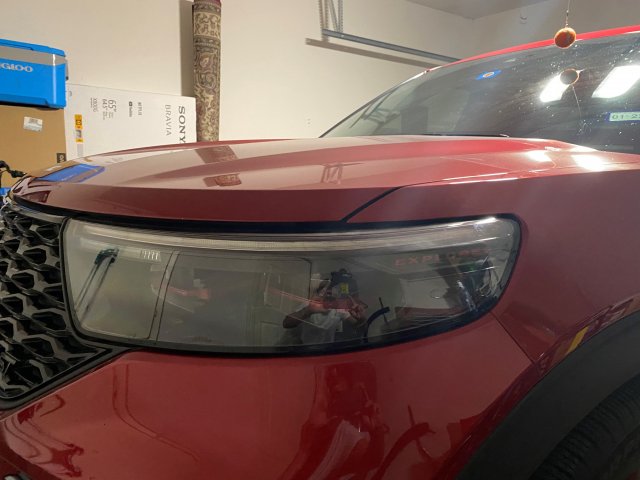
Had a little eye work done on the ST this week courtesy of Bullseye Custom Autos. Blacked out all the chrome on the headlights and fog lamps and added a little Rapid Red Accent in the headlights, along with RGB DRL's.
Attachments
-
 4 MB Views: 79
 -
 8.9 MB Views: 83
 -
 2.9 MB Views: 85
 -
 2 MB Views: 80
-
3
- Show All