• Sign Up! To view all forums and unlock additional cool features

    Welcome to the #1 Explorer ST Forum and Explorer ST community dedicated to Explorer ST owners and enthusiasts. Register for an account, it's free and it's easy, so don't hesitate to join the Explorer ST Forum today!


Mattastic's Fast mom sled build

Messages
82
Reactions
65
Points
17
Location
South Texas
#1
It's was suggested that I start a build thread, so here it is.

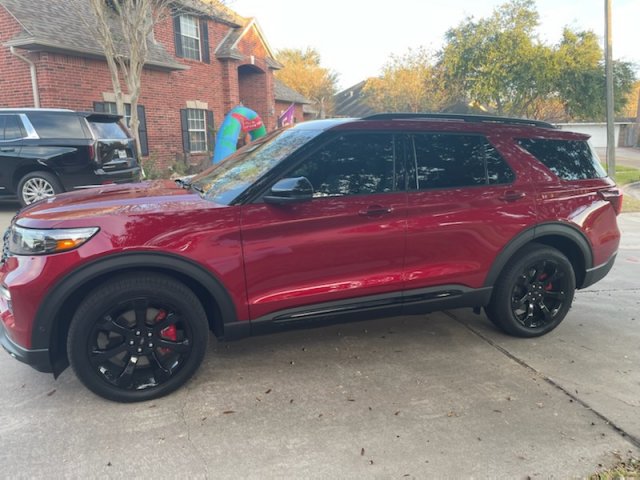
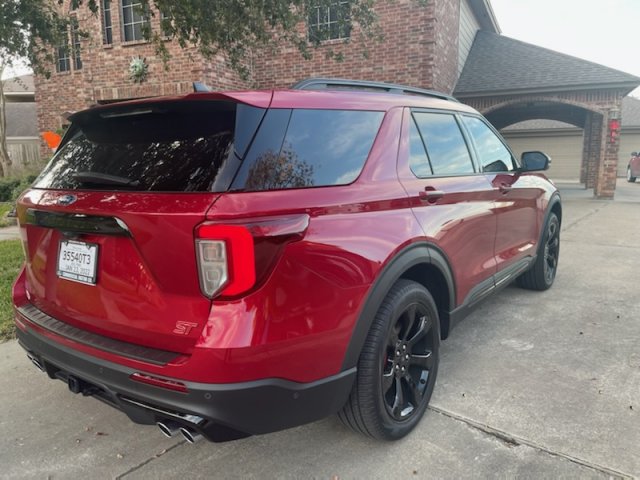
Picked up the Rapid Red in November

IMG_3814.jpg IMG_3815.jpg

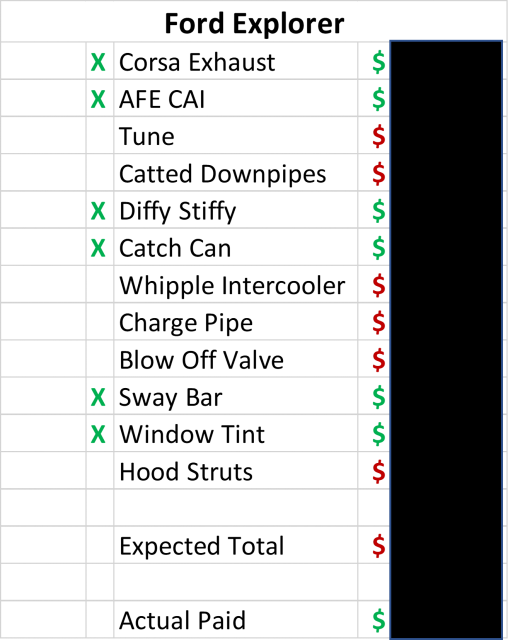
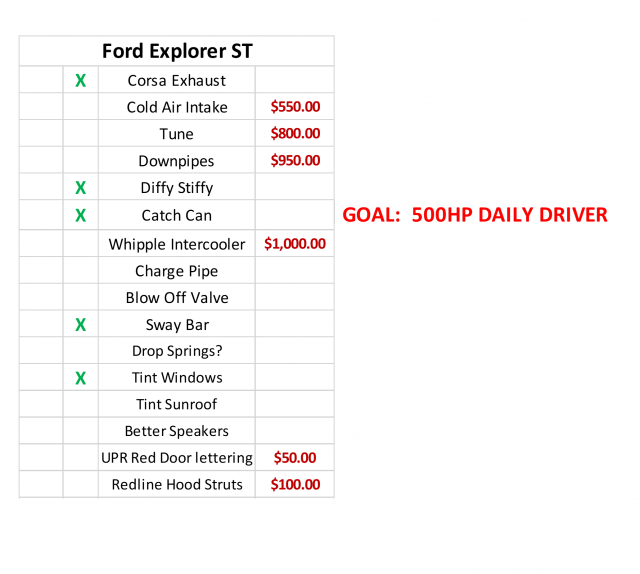
I get a little obsessive when it comes to my builds, and I like to create spreadsheets to see where I am and where I am headed. SO here's where I currently am:
Picture1.png

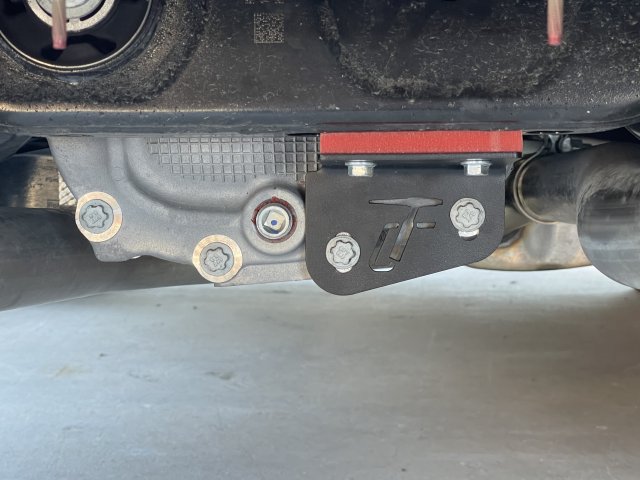
First thing I did was start combing Marketplace and ebay. Picked up the Steeda Swaybar for $75 plus $50 for shipping.

This Forscan thing is AWESOME! Disabled the FENG, disabled the double honk, and I THINK I enabled Bambi mode. Thanks to this forum!
 

OP
mattastic13
Messages
82
Reactions
65
Points
17
Location
South Texas
Thread Starter #2
The Corsa exhaust finally showed up. And what a pain to install. Out with the old (THE EASY PART)
270162494_4856932377686863_1249933750551965141_n.jpg

And in with the new. I had a major problem getting the new muffler to mate with the stock parts. Nothing a ratchet strap and judicious use of a rubber mallet wouldn't eventually fix.


I am pleasantly pleased with it. Maybe a slight bit of drone but it's settling in nicely.


Whilst there, I installed it and the Steeda Sway bar.
 

OP
mattastic13
Messages
82
Reactions
65
Points
17
Location
South Texas
Thread Starter #3
Installed LED turn signals and Forscan’d off the hyper flash. May have found how to remove Autostart/stop as well

unfortunately the plastic bolt that holds the right tail light stripped and the fell into the body cavity. So a new one is on order.
BUT the difference is amazing (left LED,right normal)
 

OP
mattastic13
Messages
82
Reactions
65
Points
17
Location
South Texas
Thread Starter #4
Installed some extra insurance since I have the 3bolt
0DF2C141-9373-4EE9-A887-827663D339F8.jpeg

AND parts have started showing up
0773F32A-86D7-4722-B8C1-55D90C086E90.jpeg B61C9D1C-6B8E-444B-A690-1DA0F1EAACD1.jpeg 72D46895-9812-4C16-8D0F-7D29E383437E.jpeg
 

OP
mattastic13
Messages
82
Reactions
65
Points
17
Location
South Texas
Thread Starter #5
Installed the AFE today. Passenger side was by far the easiest. Driver's side was a bear.
Took me about 3.5hrs.
I would suggest checking to make sure you have ALL the parts first. Then install the pieces into the new parts
IMG-4070.jpg

Starting to take everything out, passenger side is a BREEZE
IMG-4076.jpg

This part....the clip that connects to the turbo on the drivers side.....PITA. Had to use vise grips, zip ties and a lot of force wiggling to get it off...
IMG-4074.jpg

Despite what the instructions said....the little plastic pieces on the bottom of the stock airbox, didn't just come out. I was standing on the engine bay pulling with no joy.....so I drilled them out
IMG-4079.jpg IMG-4080.jpg

Stock box vs the AFE box

IMG-4078.jpg
Going back together is the reverse, and the passenger side was again the easiest. Drivers side proved to be a PITA...AGAIN. new boot to turbo AGAIN. Contortion and liberal use of my hobbit hands helped. Not sure I'll ever be able to reach the clamp to get it off PLUS I dropped a tool, so I got to find that

BUT it's done, and looks great
finnish.jpg
 

OP
mattastic13
Messages
82
Reactions
65
Points
17
Location
South Texas
Thread Starter #6
So here's where I am currently at:
Picture1.png

The wife is halting expenditures on this vehicle temporarily. But NEXT is definitely the tune.....then the downpipes. My model year doesn't have the blow-off valve. So no "whoosh" sound for me.... :(
 

OP
mattastic13
Messages
82
Reactions
65
Points
17
Location
South Texas
Thread Starter #7
48A1EE65-268A-4DE4-A8B0-6C192DD8EB50.jpeg Probably the easiest project ever!! Radar mirror tap. Followed the instructions on here and it took longer to open the packaging than it did to install it
 

Messages
153
Reactions
118
Points
37
Location
Plano, TX, USA
#8
Installed the AFE today. Passenger side was by far the easiest. Driver's side was a bear.
Took me about 3.5hrs.
I would suggest checking to make sure you have ALL the parts first. Then install the pieces into the new parts
View attachment 10025

Starting to take everything out, passenger side is a BREEZE
View attachment 10027

This part....the clip that connects to the turbo on the drivers side.....PITA. Had to use vise grips, zip ties and a lot of force wiggling to get it off...
View attachment 10026

Despite what the instructions said....the little plastic pieces on the bottom of the stock airbox, didn't just come out. I was standing on the engine bay pulling with no joy.....so I drilled them out
View attachment 10029 View attachment 10030

Stock box vs the AFE box

View attachment 10028
Going back together is the reverse, and the passenger side was again the easiest. Drivers side proved to be a PITA...AGAIN. new boot to turbo AGAIN. Contortion and liberal use of my hobbit hands helped. Not sure I'll ever be able to reach the clamp to get it off PLUS I dropped a tool, so I got to find that

BUT it's done, and looks great
View attachment 10024
The part I had trouble with was the spring clamp on the bypass overflow hose. You're at the finish line and that thing rears its ugly head. I could not get the clamp to open up far enough to get over the lip of the aFe tube. Couple that with no room for two hands, the new tube moves away from the hose (because it's connected with rubber transitions) when you're trying to pull the hose on (because it's connected with rubber transitions), etc., it was a PITA. Fortunately, it isn't a high-pressure hose, so I just pulled the hose over the tube, drove to Home Depot and bought a worm gear clamp lol.
 

SmittysST

Member
Law Enforcement
Messages
113
Reactions
20
Points
17
Location
SOCAL
Vehicle
2023 FORD Explorer ST
#9
The Corsa exhaust finally showed up. And what a pain to install. Out with the old (THE EASY PART)
View attachment 10019

And in with the new. I had a major problem getting the new muffler to mate with the stock parts. Nothing a ratchet strap and judicious use of a rubber mallet wouldn't eventually fix.


I am pleasantly pleased with it. Maybe a slight bit of drone but it's settling in nicely.


Whilst there, I installed it and the Steeda Sway bar.
So what all had to be done here for the install? About to pull the trigger on a corsa cat back. sounds great!


Top